Microsoft NPS supports various authentication methods and categorize them into two major groups: those being secure and those being less secure.
Less secure authentication methods
Microsoft classifies the protocols below as less secure.
- Microsoft Encryption Authentication version 2 (MS-CHAP-v2)
- Microsoft Encrypted Authentication (MS-CHAP)
- Encrypted authentication (CHAP)
- Unencrypted authentication (PAP, SPAP)
PAP and CHAP are the main protocols in this category while the others are extended or improved version of them.
Password Authentication Protocol (PAP)
It is a very old authentication method and was commonly used in Point to Point Protocol (PPP). Since it sends password in clear text, it is called a highly insecure protocol. I assume you remember that we used PAP in “NPS Configuration and AAA Testing (Part 2)” article. Maybe you have a question mark hangs over your head now 😊 It is not completely unsecure the way we used. Let me show you our user’s, jane’s, RADIUS “Access-Request” packet in Wireshark.
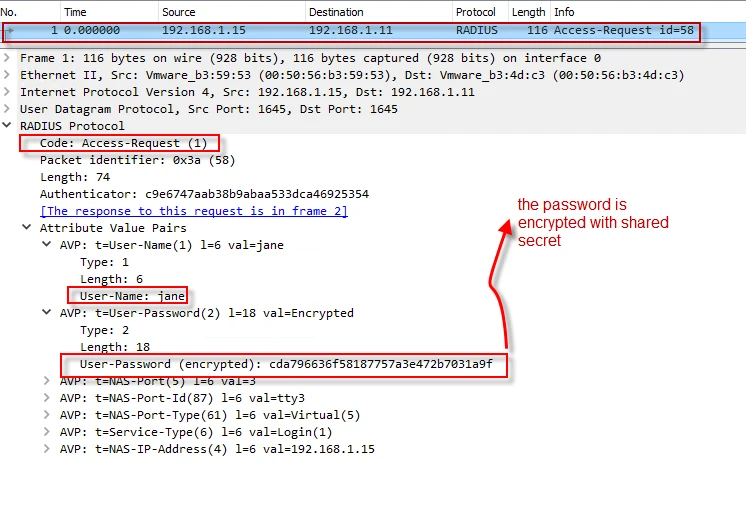
As you see in the request packet, jane’s password is not in form of clear text. RADIUS protocol encrypts it with the shared secret. I will explain how to decrypt user password in another article when it is sent through standard “User-Password” RADIUS attribute.
Challenge Handshake Authentication Protocol (CHAP)
Compared to PAP, CHAP is considered more secure. It is a challenge-based authentication protocol. When a client makes a request to the server for authentication, the server responses back with a “challenge” message, which is a random message/number. With help of MD5, the client uses the challenge and the user’s other credentials and creates a response. When server receives the packet, it will check if the credentials are valid, using the same method the way the client did. Following shows a CHAP attribute in the RADIUS “Access-Request” packet.
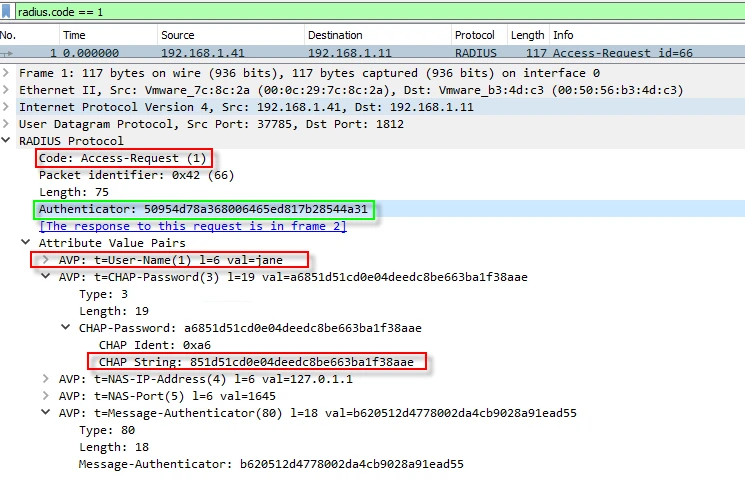
According to rfc2865 (https://www.rfc-editor.org/rfc/rfc2865.html#page-59 ), when a client sends a Chap-Password, it uses an attribute (Type 60 CHAP-Challenge) to specify the “CHAP-Challenge” message. As you can see in the screenshot above, there is no such attribute as “CHAP-Challenge”. But in the same RFC, it also says when the “CHAP-Challenge” attribute is not present, the request “Authenticator” must be used. I marked it in the screenshot.
MS-CHAP and MS-CHAP-v2 are improved versions of CHAP. I tested MS-CHAP against my NPS and captured the packet below. This time, the client inserted the challenge message in the packet.
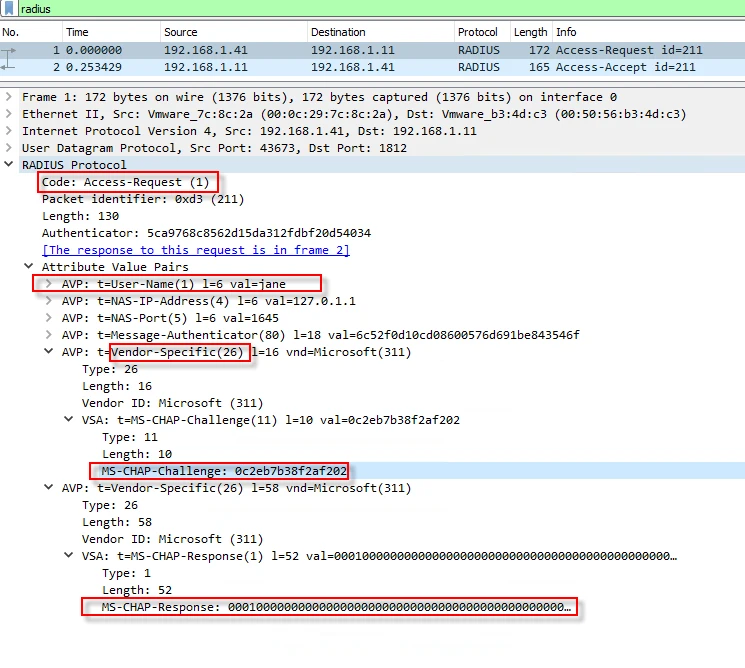
Since, MS-CHAP is a vendor specific protocol, the challenge attribute was sent in vendor specific attribute. Do not get confused with CHAP and MS-CHAP. They use different attributes to carry the challenge message.
Secure authentication methods
Extensible Authentication Protocol (EAP) is an authentication framework, not a specific authentication protocol like PAP, CHAP or MS-CHAP flavors.
Microsoft NPS supports many EAP flavors and considers EAP types below as secure.
- Microsoft: Smart Card or other Certificate
- Microsoft: Protected EAP (PEAP)
- Microsoft: Secured password (EAP-MSCHAP v2)
Protected EAP (PEAP) needs a certificate and TLS support. Thus, I will install “Active Directory Certificate Services” role.
Certificate Authority (CA) Installation
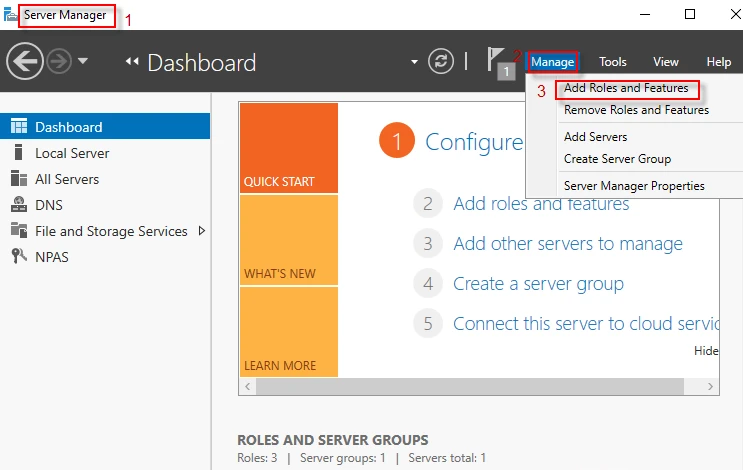
Step-1: Open Sever Manager Dashboard and navigate to Manage → Add Roles and Features
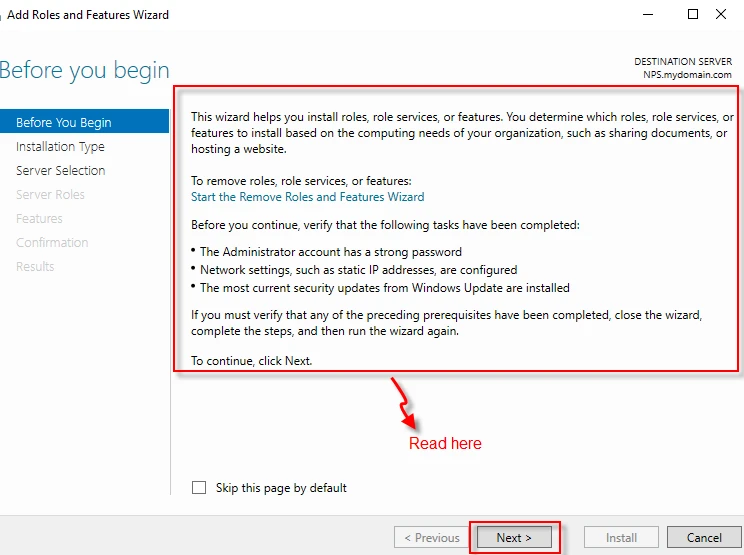
Step-2: After reading the wizard, click on “Next” button.
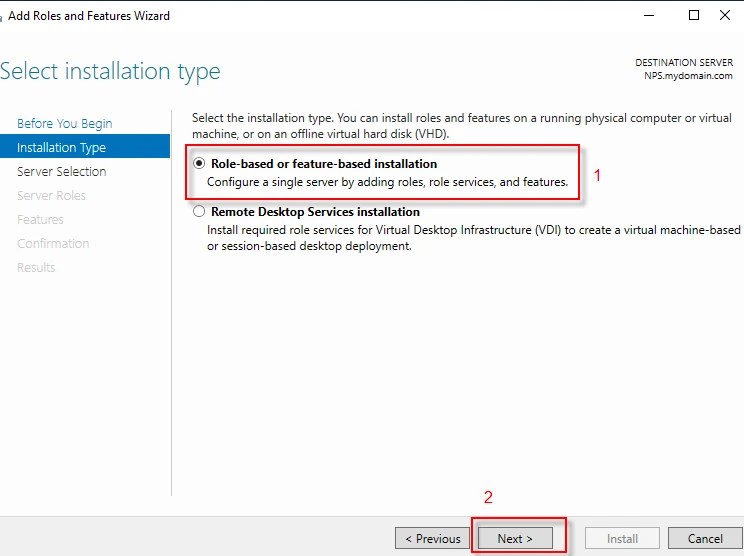
Step-3: Select “Role-based or feature-based installation” and click on “Next” button.
**
**
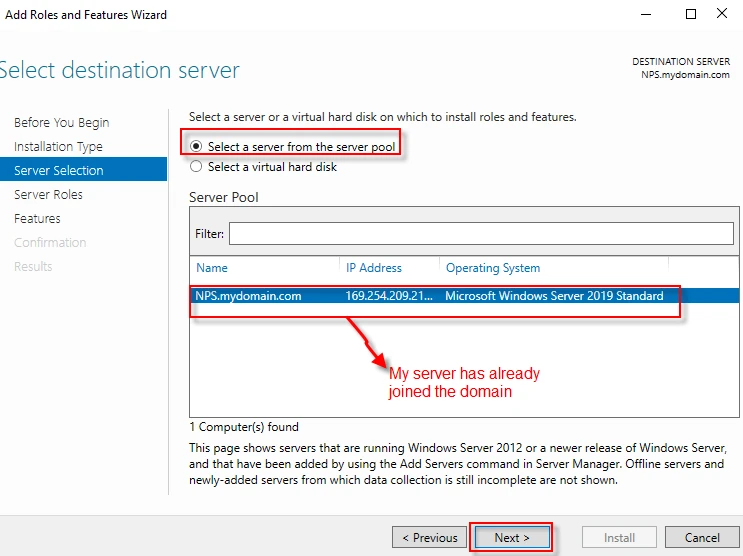
Step-4: Select a server from the server pool. Click on “Next” button. As you can see below, my server -NPS- has already joined the domain (mydomain.com).
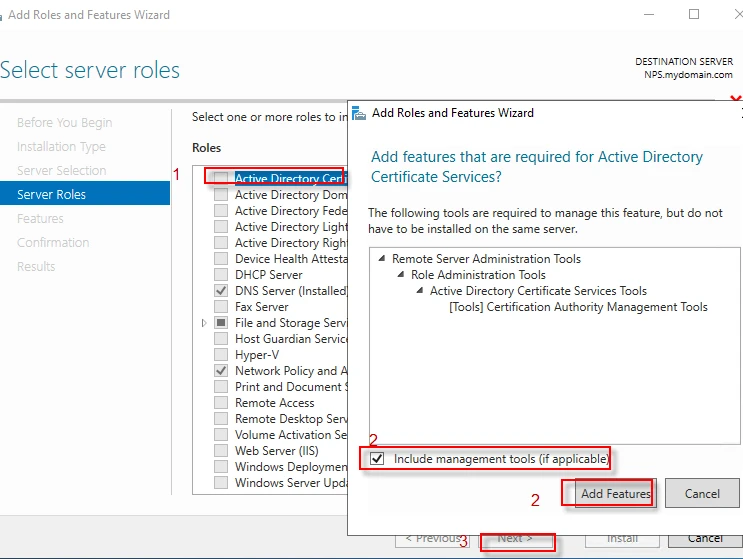
Step-5: Select “Active Directory Certificate Services” from “Roles” list. A window appears, follow the steps in the screenshot below and click “Next” to proceed.
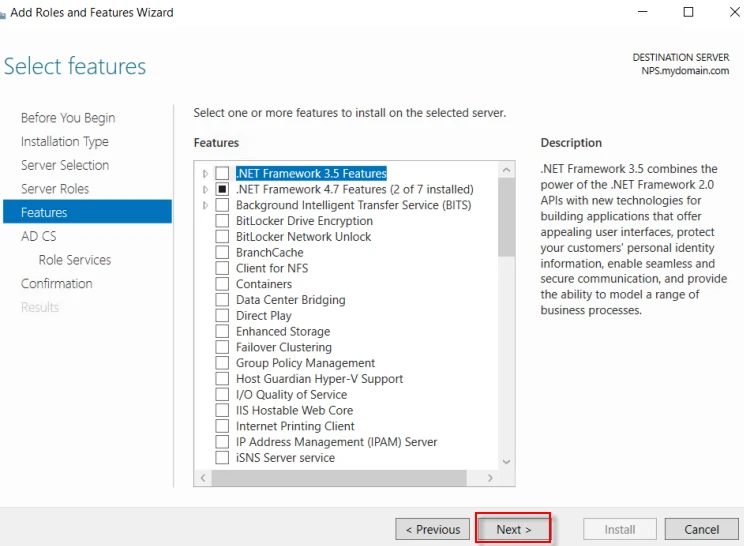
Step-6: Click “Next”.
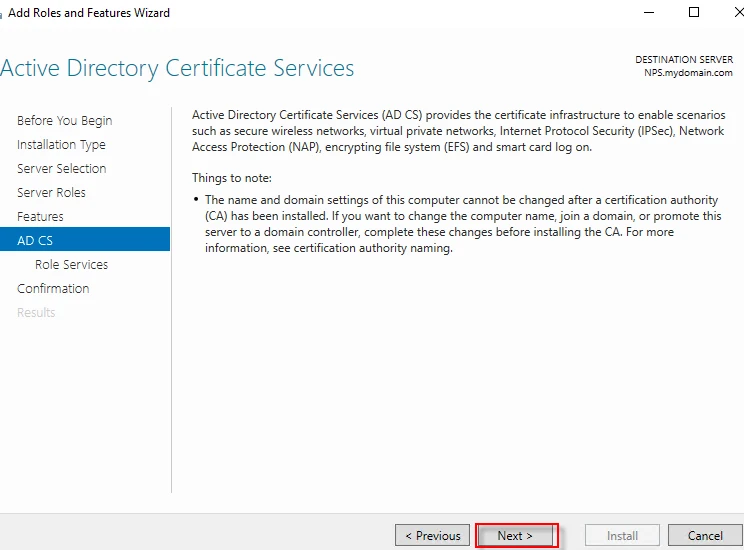
Step-7: Click “Next”.
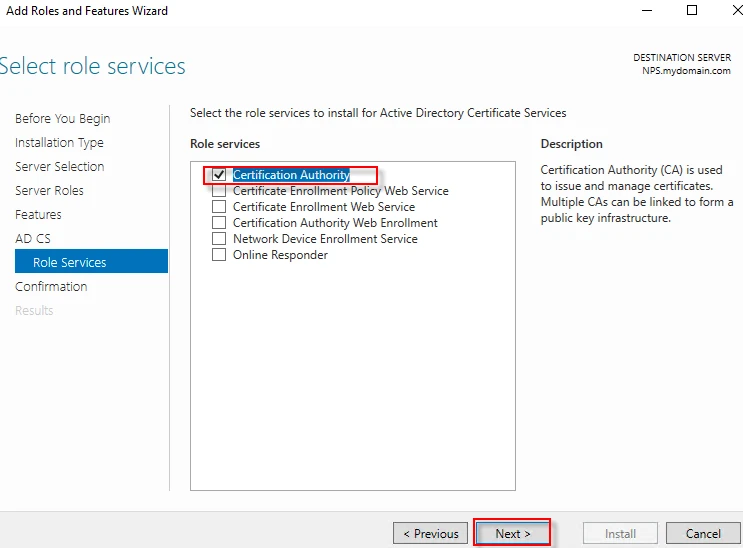
Step-8: Click “Next”.
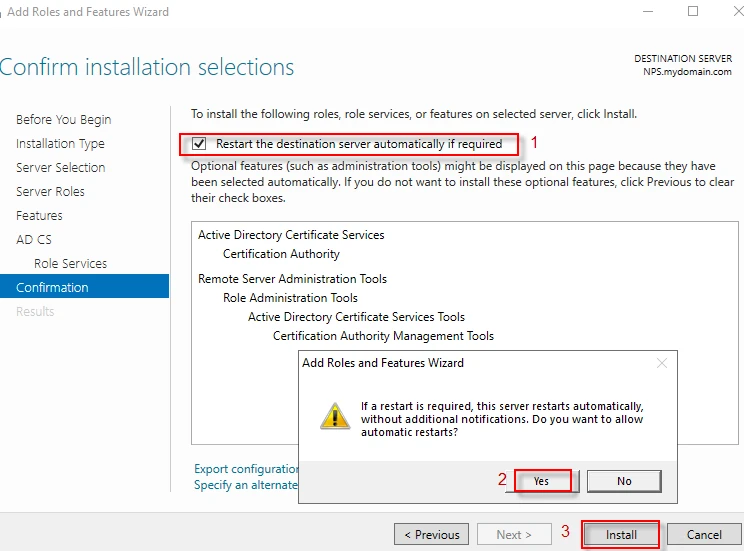
Step-9: Follow the steps below and click “Install”.
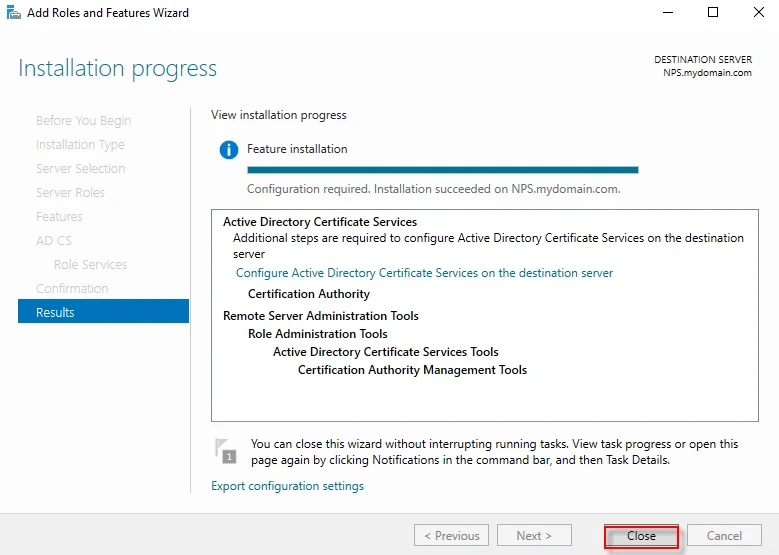
Step-10: Click “Close” to finish the installation.
Configure Active Directory Certificate Services
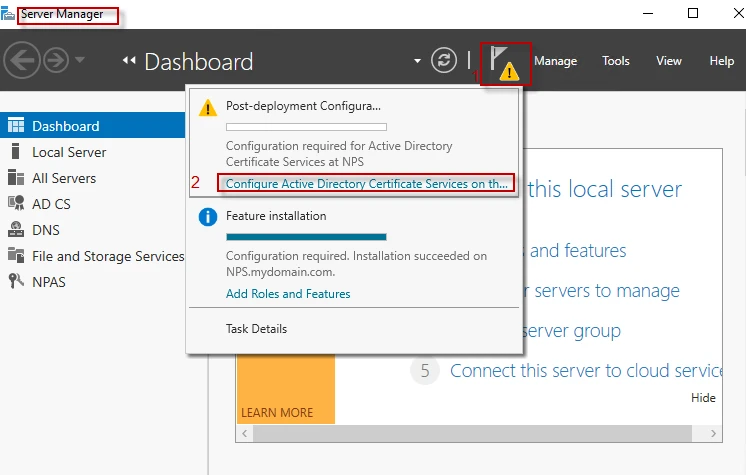
Step-1: Launch Sever Manager Dashboard and follow the steps below.
**
**
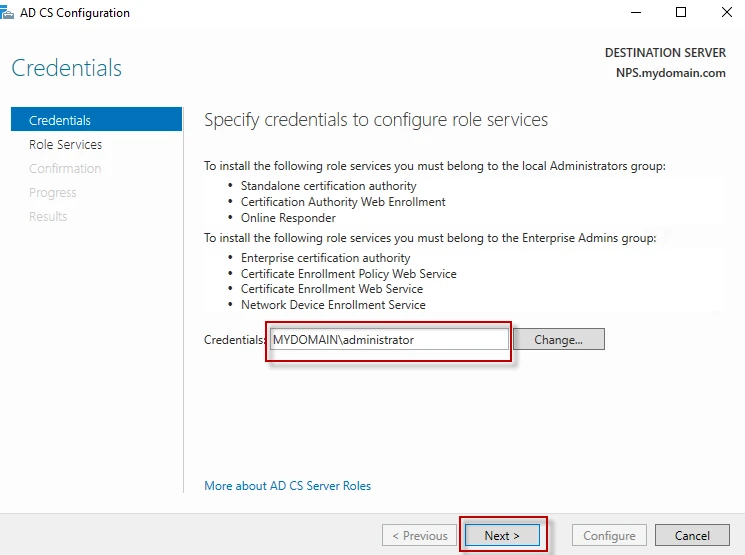
Step-2: Enter the credentials and click “Next”.
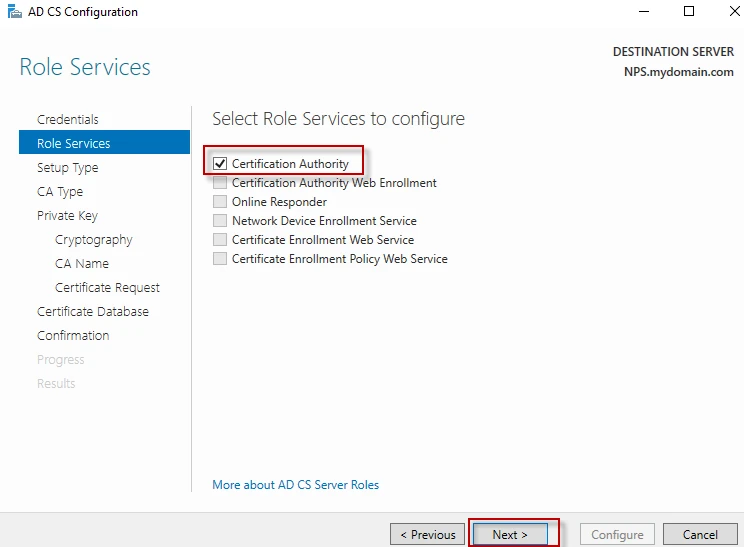
Step-3: Select “Certification Authority” and click “Next”.
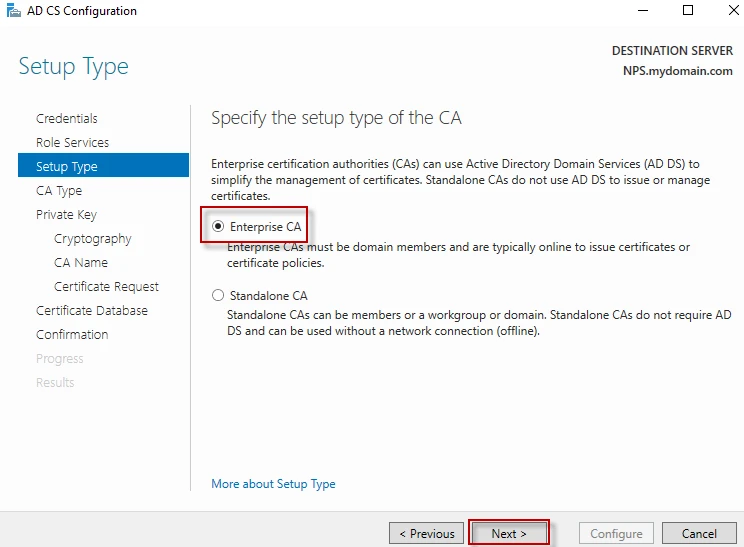
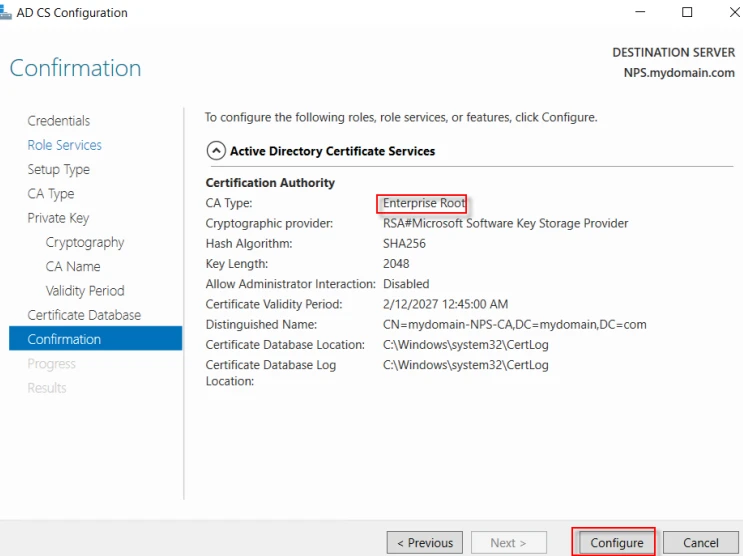
Step-4: Select “Enterprise CA” and click “Next”.
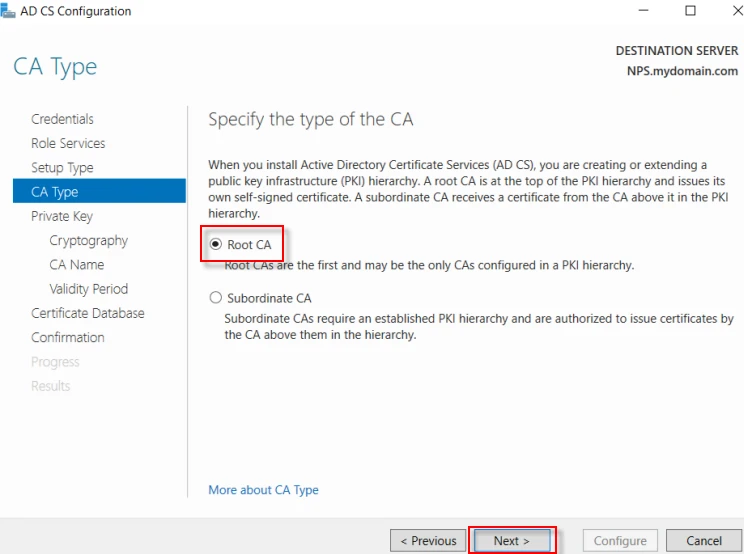
Step-5: Select “Root CA” and click “Next”.
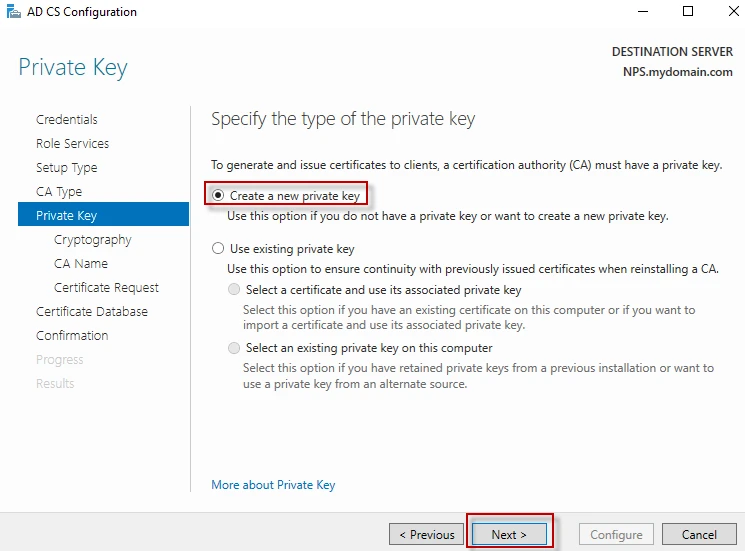
Step-6: Select “Create a new private key” and click “Next”.
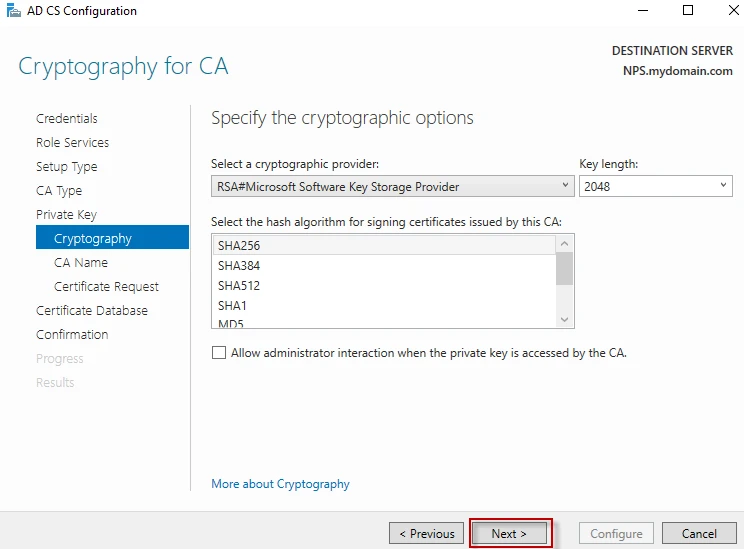
Step-7: Select any cryptographic provider and hash algorithm as you wish, and then click “Next”.
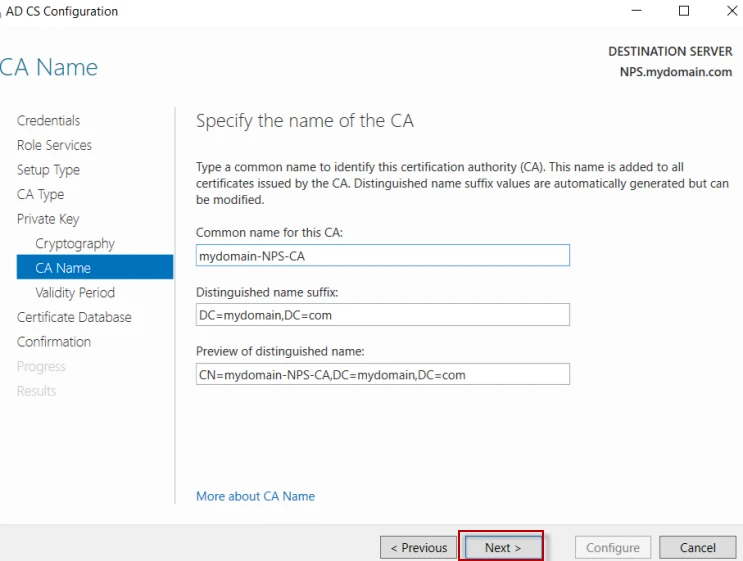
Step-8: Specify the common name of the CA, and then click “Next”.
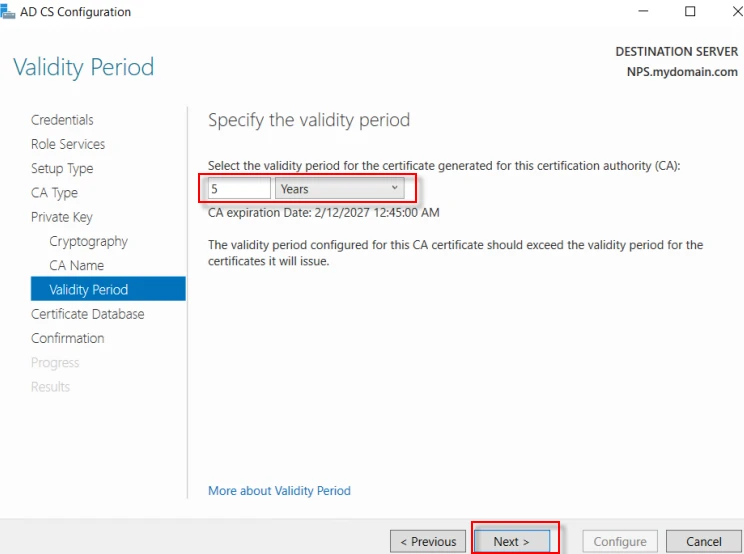
Step-9: Specify the validity period, and then click “Next”.
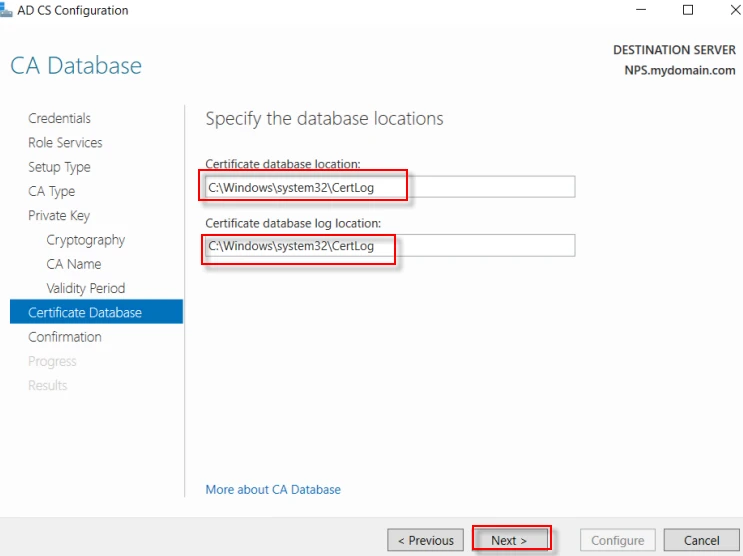
Step-10: Specify the database locations, and then click “Next”.
Step-11: Click “Configure” to configure the futures, roles and services.
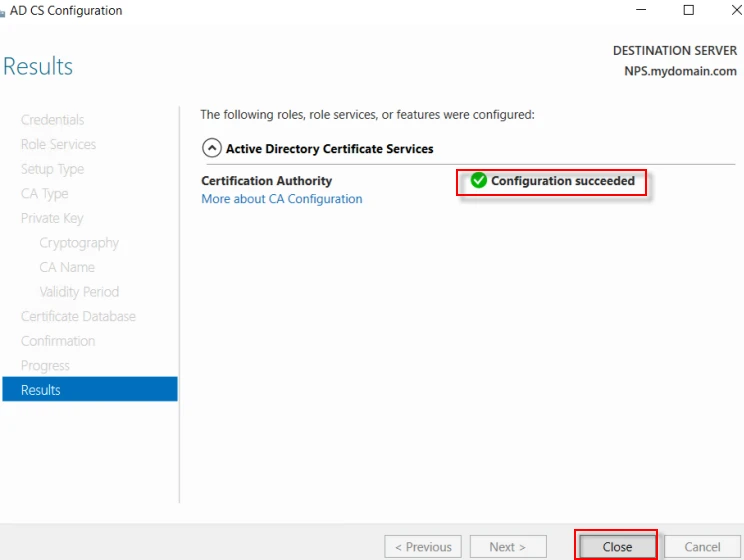
Step-12: Click “Close” to finish the configuration.
NPS configuration for PEAP-Mscahpv2
We can configure “Configure Request Policy” and “Network Policy”, following steps in this article “NPS Configuration and AAA Testing (Part 2)”. This time, I will follow another way which is shorter.
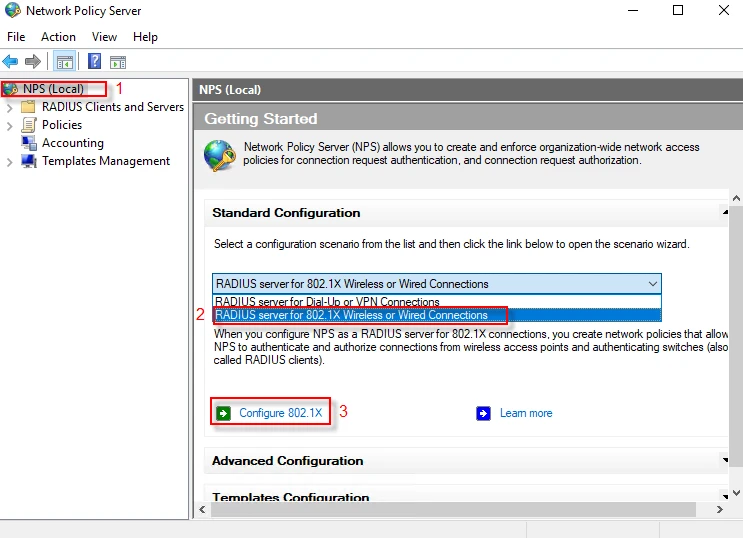
Step-1: Select your local NPS server at the left pane, and then select “RADIUS server for 802.1X Wireless or Wired Connections” at the right pane. Next, click on “Configure 802.1X”.
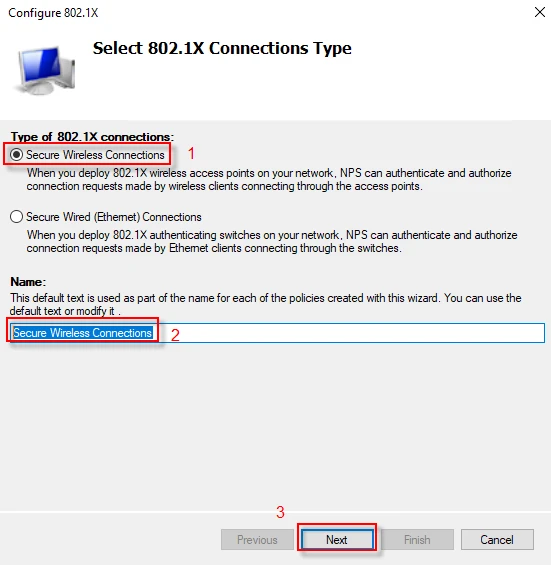
Step-2: Select “Secure Wireless Connections” option and name it as you wish, then click “Next”.
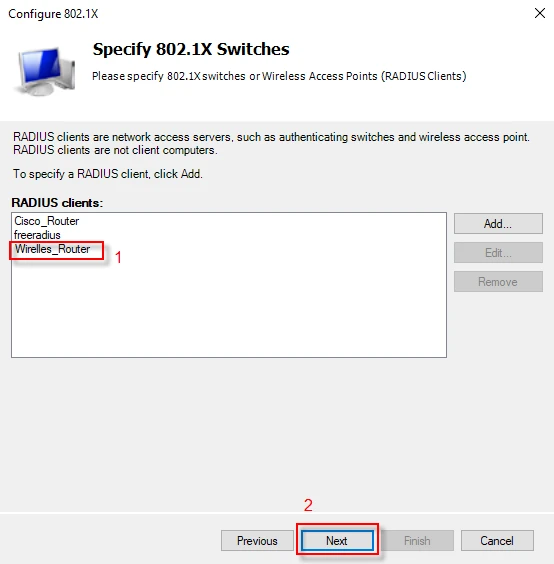
Step-3: I assume you have already defined a RADIUS client, if not, visit here (“NPS Configuration and AAA Testing (Part 2)”. Select a RADIUS client from the list and click “Next”.
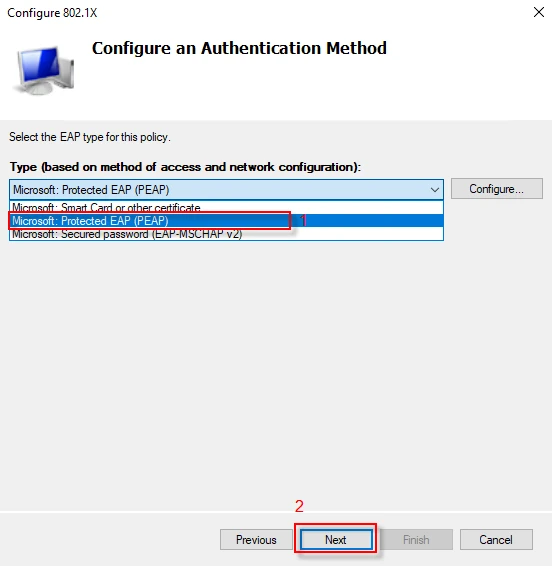
Step-4: Select “Microsoft: Protected EAP(PEAP)” from the drop down list and click “Next”.
**
**
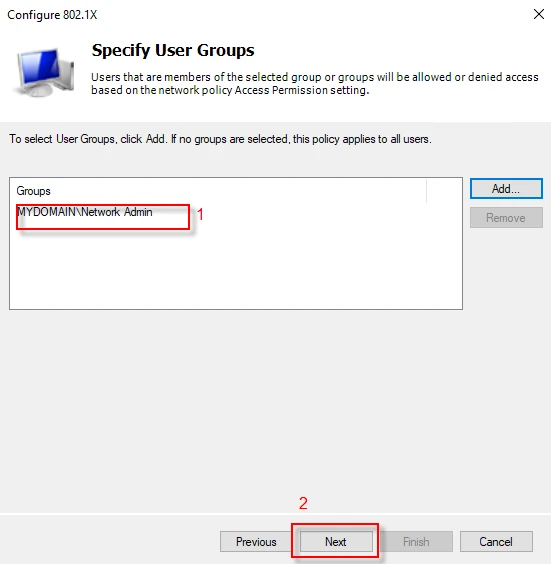
Step-5: Select a user group and click “Next”.
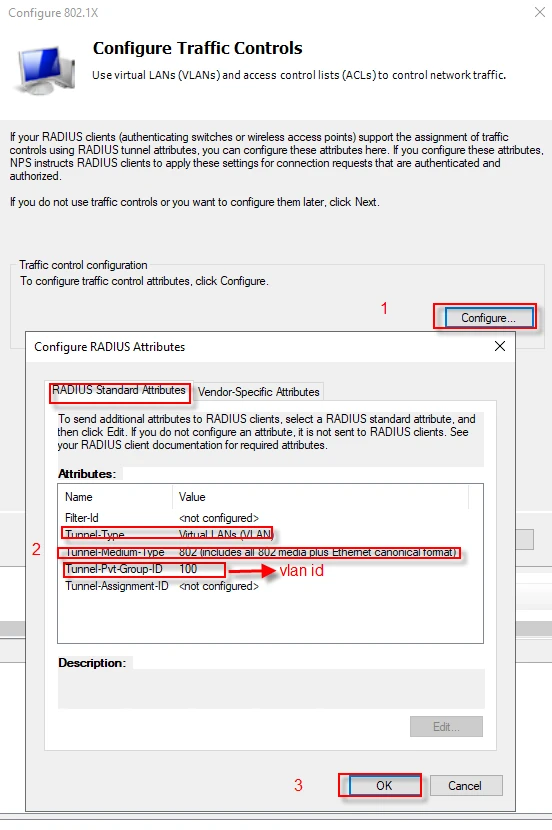
Step-6: In this step, we will configure dynamic vlan assignment through “RADIUS Standard Attributes. You can add some vendor specific attributes as well. Follow the steps below and click “Next”.
Step-7: In this step, it specifies that you have already created polices both for “Connection Request” and “Network”. Click on “Finish” button to complete the configuration.

Testing PEAP and Mschapv2 with Wireshark
I connected my wireless network while I was capturing packets with Wireshark. There has been a series of request response packets between the client and the RADIUS server. I will explain a couple of these packets.
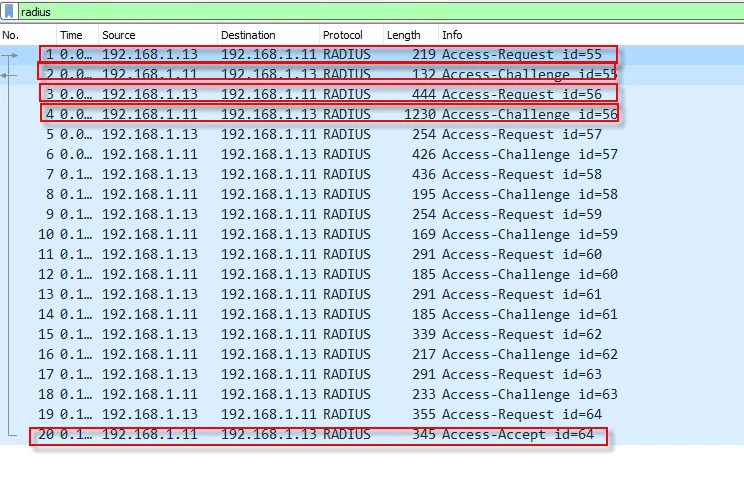
Packet-1: The NAS sends an “Access-Request” packet, specifying that it desires to use Extensible Authentication Protocol (EAP) with jane’s credentials as well as some vendor specific and standard attributes.

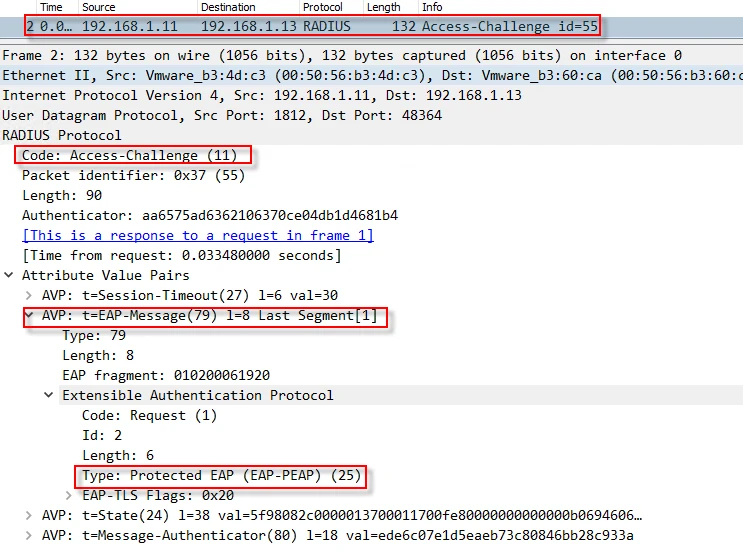
Packet-2: The RADIUS server responses with an “Access-Challenge” packet, offering EAP-PEAP authentication method, which uses a certificate and TLS for some part of the communication.
Packet-3: The NAS creates a new “Access-Request” packet, starting TLS negotiations. As you see below, in EAP-Message Attribute Value Pair (AVP), the RADIUS client inserts TLS “Client Hello”, which contains parameters like “Cipher Suits”, “Compression Methods” etc.

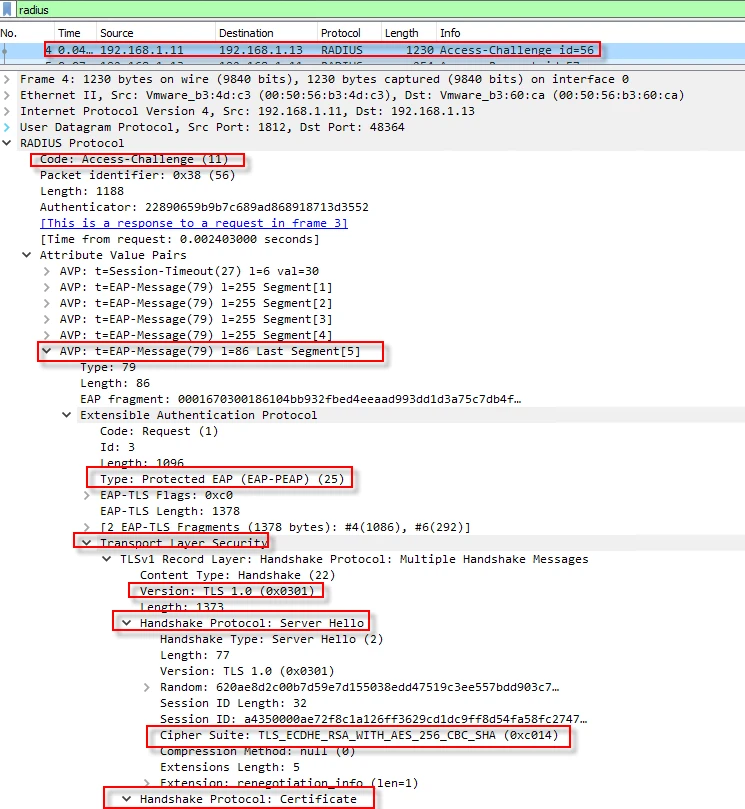
Packet-4: The RADIUS server responses with an “Access-Challenge” packet which contains the server certificate and TLS parameters.
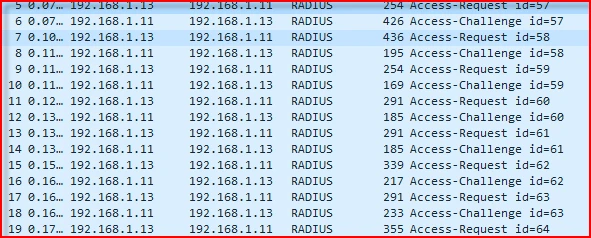
Packets-(5-19): A single RADIUS attribute can have up to 253 bytes of data according to RFC 2865. Because of that, when EAP payload passes that threshold, it gets fragmented and transmitted in multiple EAP-Messages. Since the TLS excahnges happen in fragments, the RADIUS client sends an ACK in the packet number 5. After packet number 6, both sides establish a secure tunnel. Once creating a secure TLS tunnel between the user and the radius server, mschapv2 authentication starts.
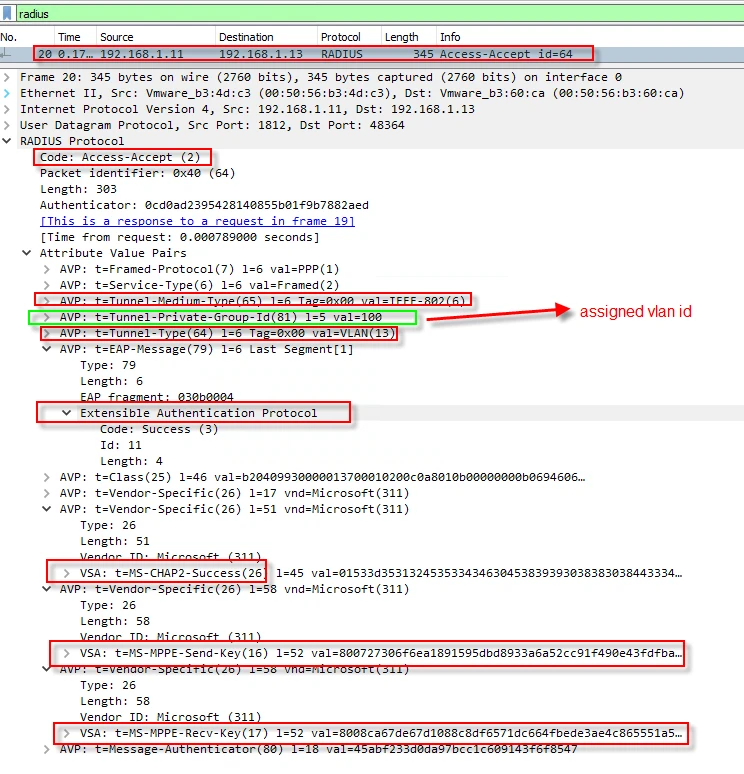
Packet-20: The RADIUS server authenticates the user and sends an “Access-Accept” packet, informing the NAS to grant access to the client. The packet carries Vlan id information, which lets the NAS to place the client into that vlan. Beside that the packet also contains “Send and Receive encryption and decryption keys” in vendor specific attributes. The client derives the same keys, using user credentials and parameters negotiated during EAP-PEAP. The traffic between the client and wireless router will be encrypted and decrypted with these keys.
Final thoughts
NPS supports many authentications methods ranging from less secure to more secure, which provide backward compatibility that allows for interoperability with older legacy clients. Installing and configuring NPS is easier compared to its competitors.