
After installing NPS and configuring the NAS (router) in Part 1, we will set up NPS for authentication, authorization, and accounting services.
Register NPS
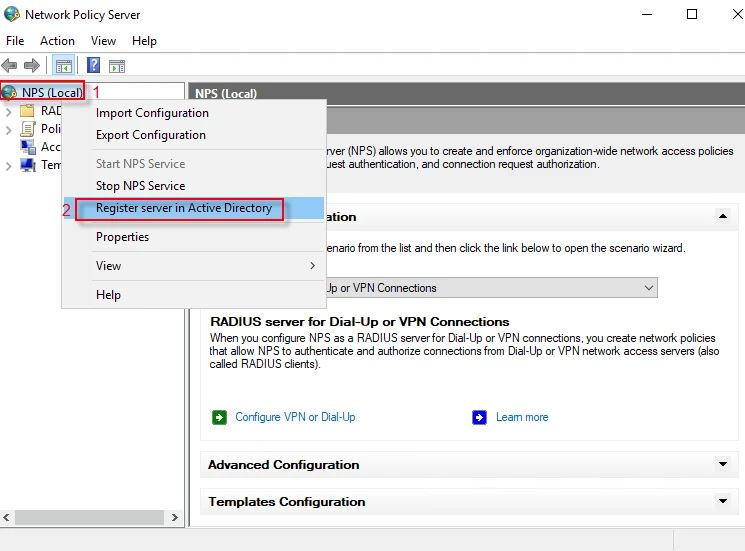
Step-1: Launch Server Manager and navigate to Tools → Network Policy Server
Step-2: Right click on your server (my server name is “NPS(Local)”), then click on “Register server in Active Directory” to have permission to access user account credentials and dial-in properties in Active Directory.
Create a RADIUS client
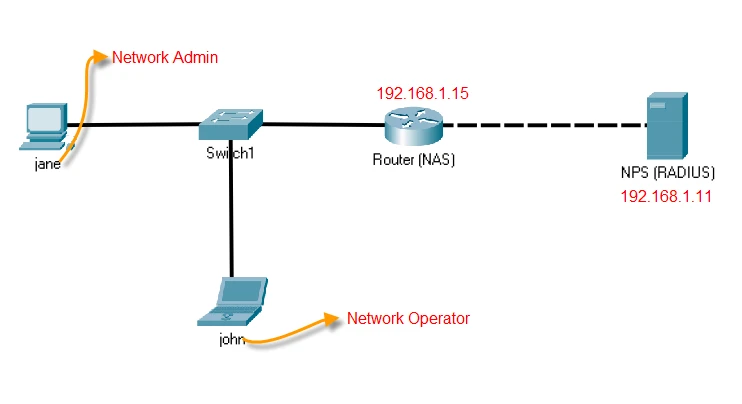
Before configuring NPS policies, look at the topology below. NPS will not processes the requests coming from any client (NAS). We need to define a new RADIUS client (NAS) on NPS.
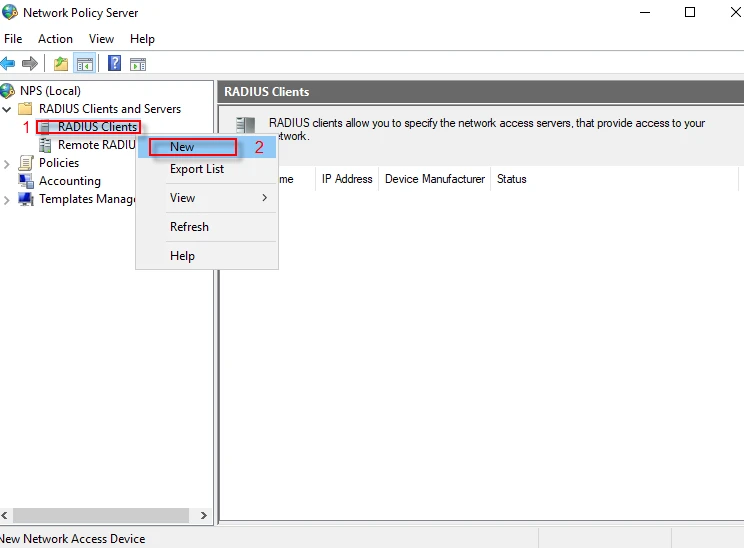
Step-1: Expand “Radius client and Servers” and right click on “RADIUS Clients”, then click on “New”.
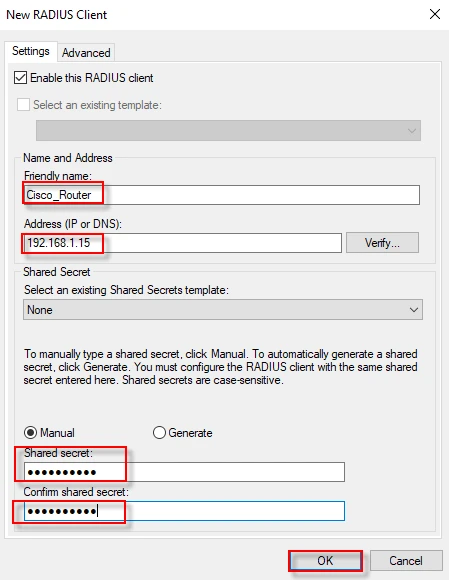
Step-2: Thick “Enable this RADIUS client” and fill “Friendly name and Address (IP or DNS)” fields. You can create the shared secret (key) either Manually or by automatic generation. Ensure that the shared secret key must match at the both side NPS and NAS. I select “Manual” and enter my key on the NAS (router). Click “OK” to finish this step.
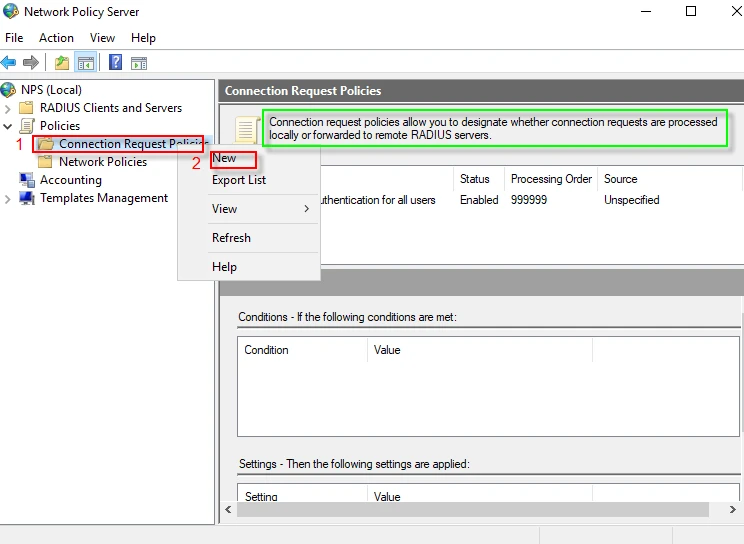
Define a connection request policy
Step-1: We will define a “Connection Request Policy” which allows you to designate whether connection requests are processed locally or forwarded to remote RADIUS servers. Sometimes we may want to forward the request to another RADIUS server. For example, we can forward the request coming from wireless network to a different RADIUS server while processing wired network requests locally. Sharing load or separating roles between multiple RADIUS server prevents enterprise wide system failures.
Navigate to “Policies” and expand it. Right click on “Connection Request Policy” to create a new policy, then click on “New”.
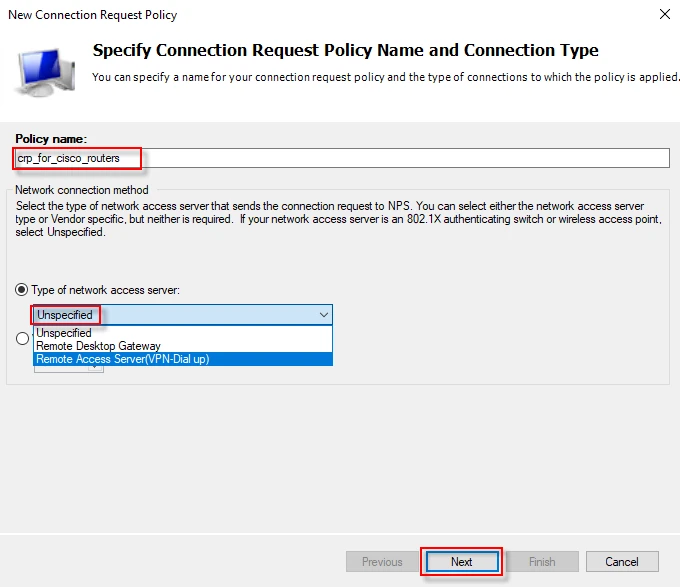
Step-2: Give a name to your policy (for instance, crp_for_cisco_routers) and select “Unspecified” from drop down list, then click “Next”.
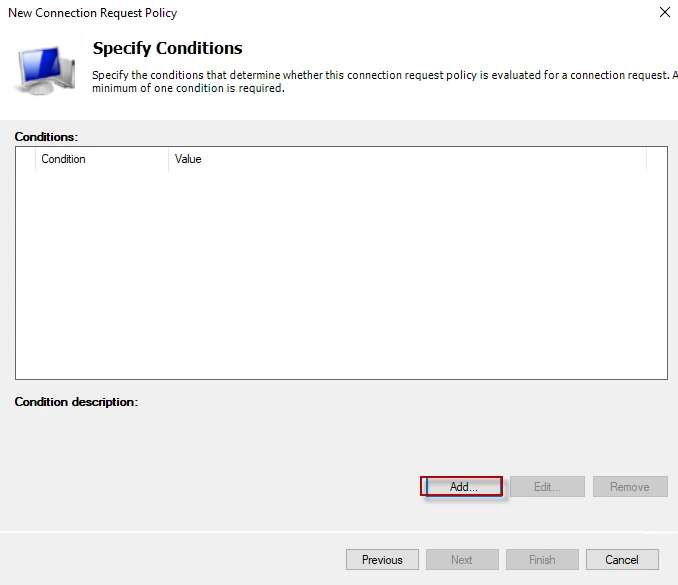
Step-3: We need to specify what criteria is needed to be met. Click on the “Add” button to create a condition (filter).
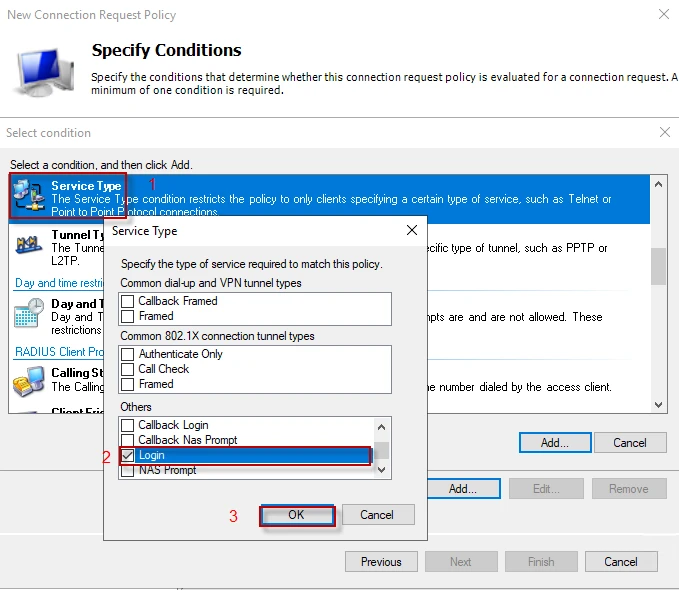
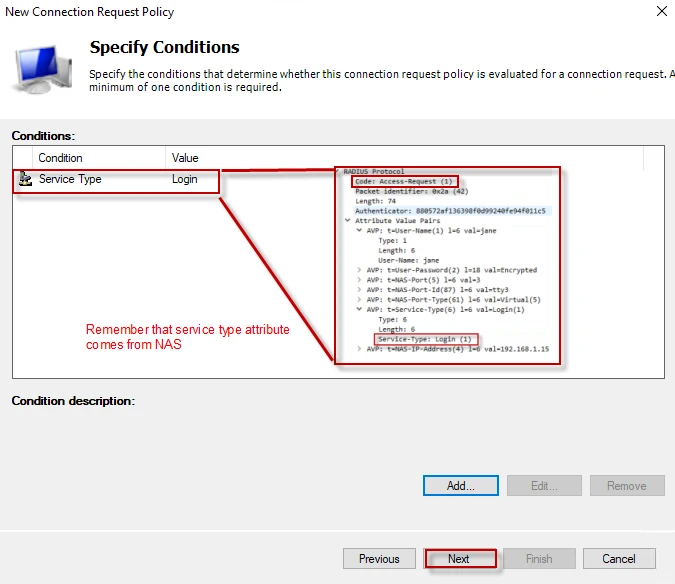
Step-4: A window offering multiple options appears. You can add any condition you want, as long as it matches. Remember I made the router send “Service-Type: Login”, I will use this attribute as a condition. Scroll down and find “Service Type” in the list. Double click on it or just click “Add”. Go to “Other” list and enable “Login” option, and then click “OK”. You can use multiple condition.
Step-5: “Service-Type” attribute comes from the NAS. I pasted an “Accept-Request” details from Wireshark on the following screenshot so that it should be easier to understand. In short, “Service-Type” will match the attribute in the “Accept-Request” packet. To proceed, click “Next”.
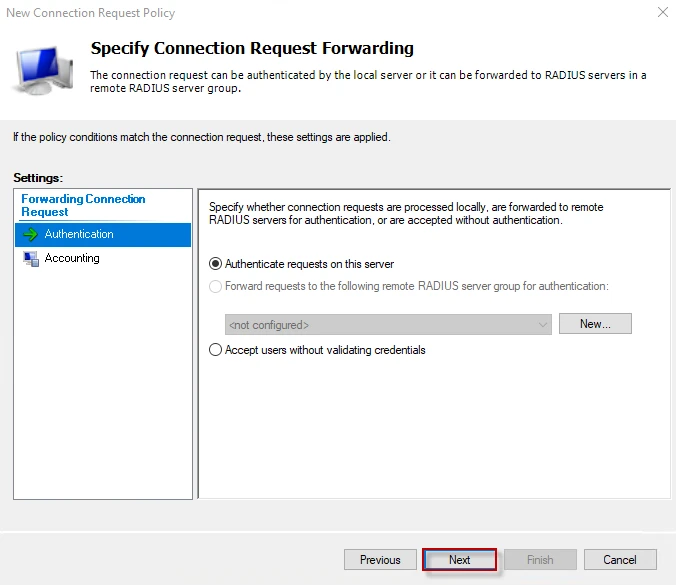
Step-6: In this window, we can select whether the local server process the request or we will forward it to another server. If we want to deliver the request to another RADIUS server, we can define a new server by clicking on the “New” button. Since I want the connection requests to be processed locally, I click on the “Next” button. The same thing is valid for “Accounting” as well.
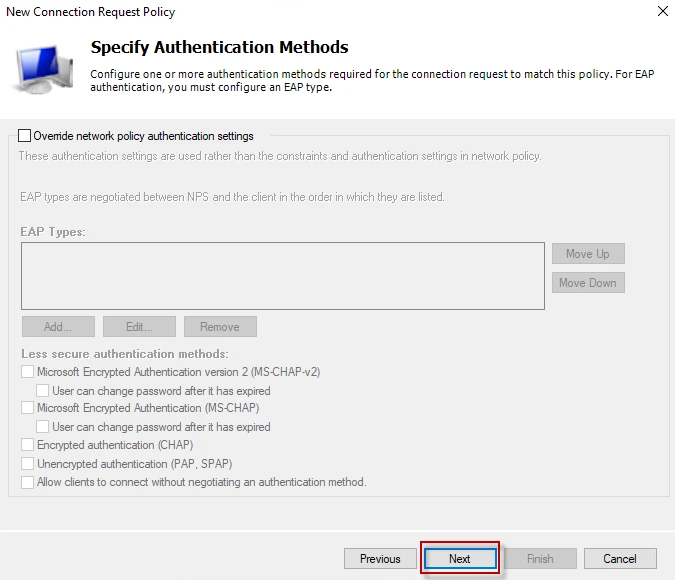
Step-7: Since, we will define the authentication method in the network policy, leave everything to the default and click “Next”.
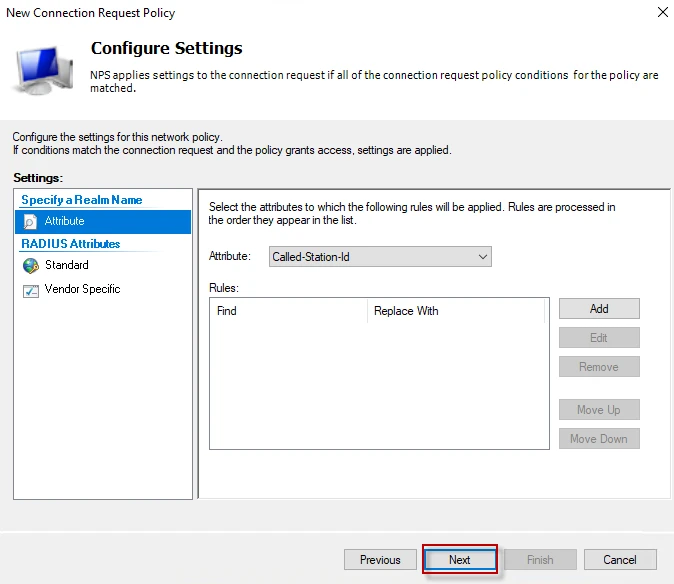
Step-8: We will send vendor specific attributes (privilege levels for Cisco’s router) in network policy, just click “Next” to proceed.
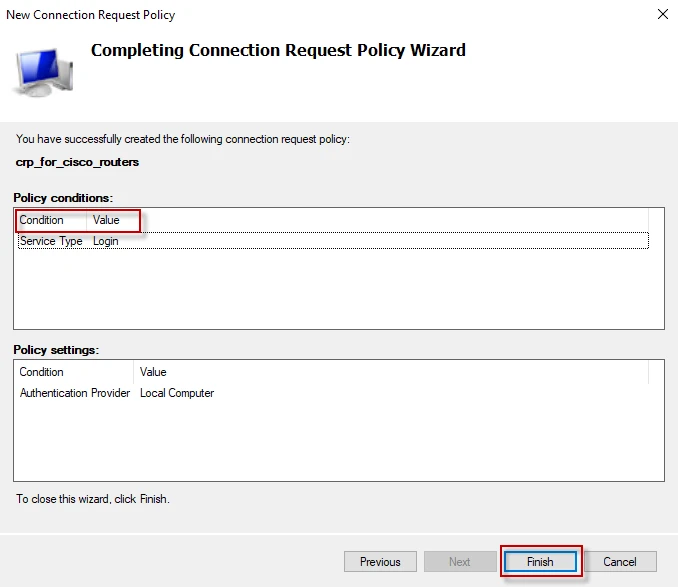
Step-9: Click “Finish” to complete connection request policy.****
Define a network policy
Defining a network policy is almost the same as defining a connection request policy. The policy will authenticate and authorize the users.
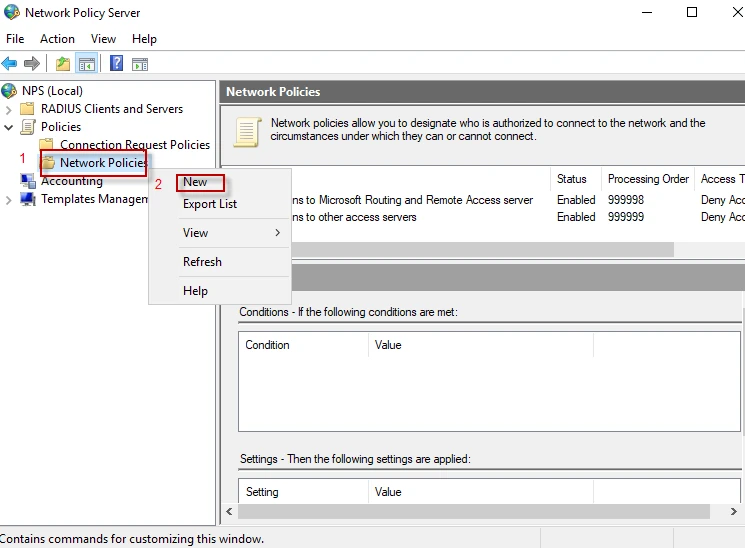
Step-1: Navigate to “Policies” and expand it. Right click on “Network Policies” to create a new policy, then click on “New”.
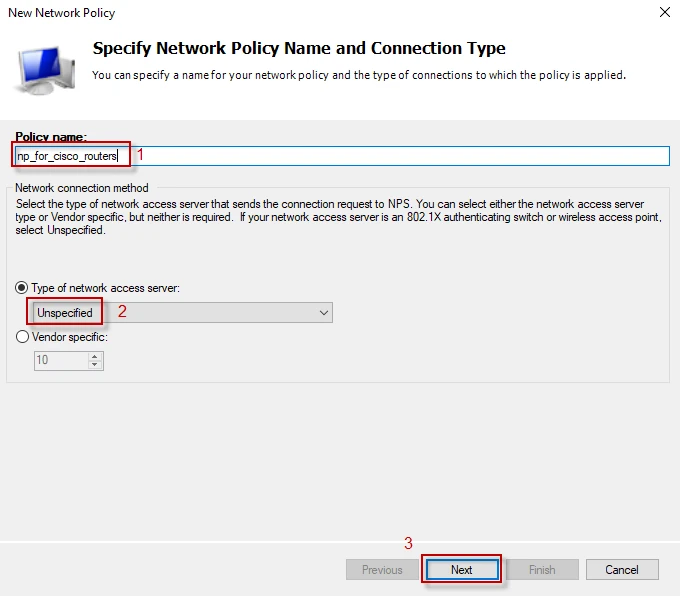
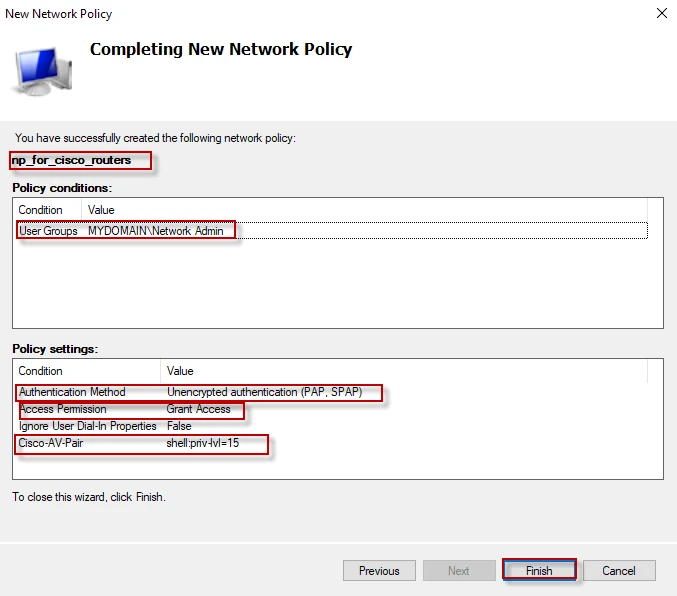
Step-2: Give a name to your policy (for instance, np_for_cisco_routers) and select “Unspecified” from drop down list, then click “Next”.
Step-3: Click on the “Add” button to create a condition (filter).

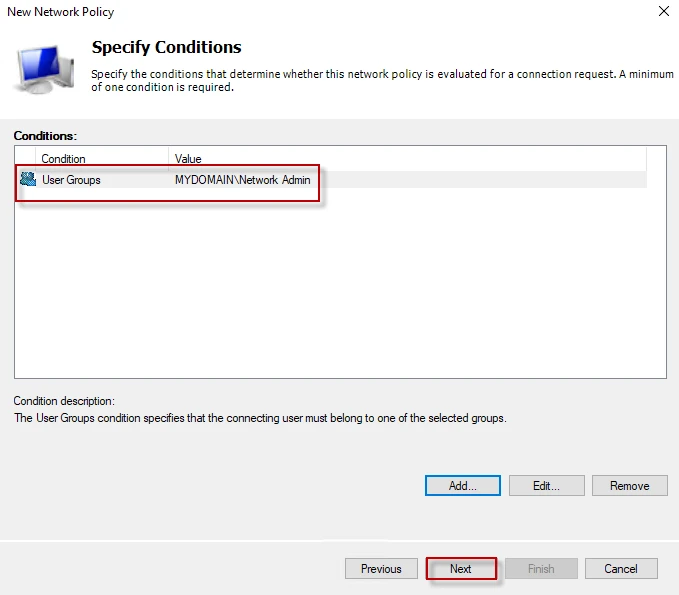
Step-4: In this window, we will set the condition needed to be matched. When the “Access-Request” packet is received, the server will check if the user is a member of “Network Admin” group or not. If the user’s credential is valid, the server will authenticate and authorize the user with a privilege level. Select “User Groups” and click “Add”. From that window, click “Add Groups..” then select “Network Admin” group and click “OK”, then “OK” again.

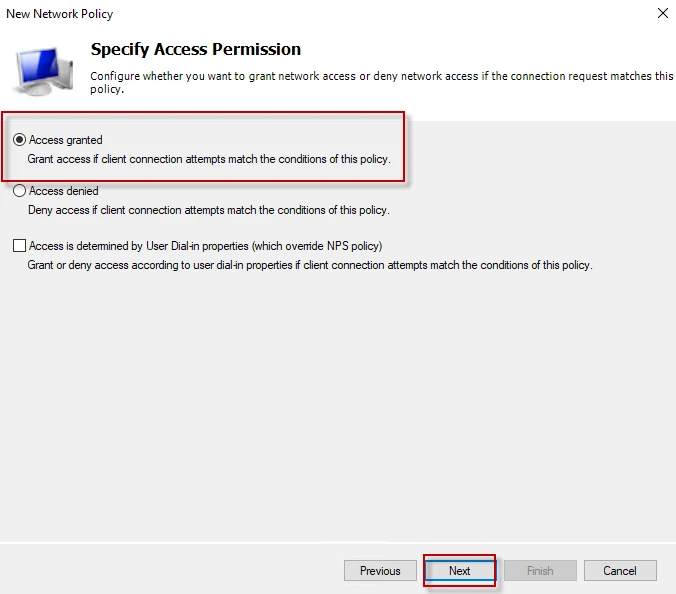
Step-5: Select “Access granted” which means the user has passed the authentication successfully. Click “Next”
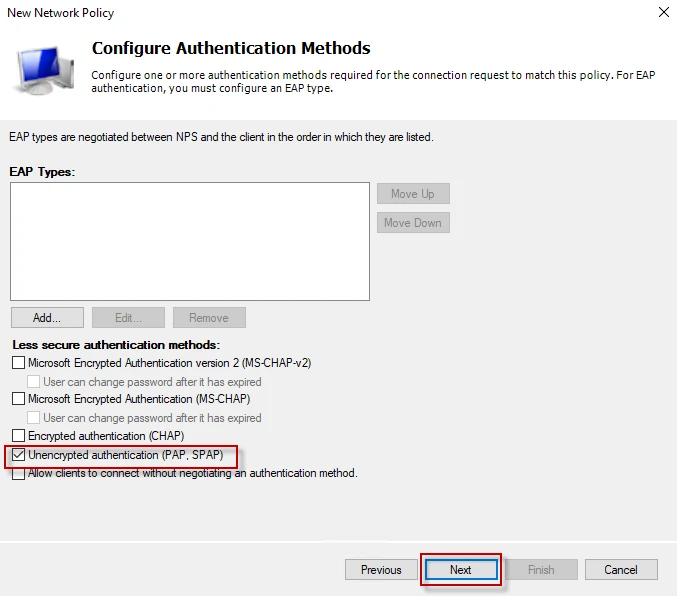
Step-6: This is the one of the most important steps. Cisco routers uses Password Authentication Protocol (PAP). Thus, I will select PAP and click on “Next”. You can select multiple authentication method from the list to support.
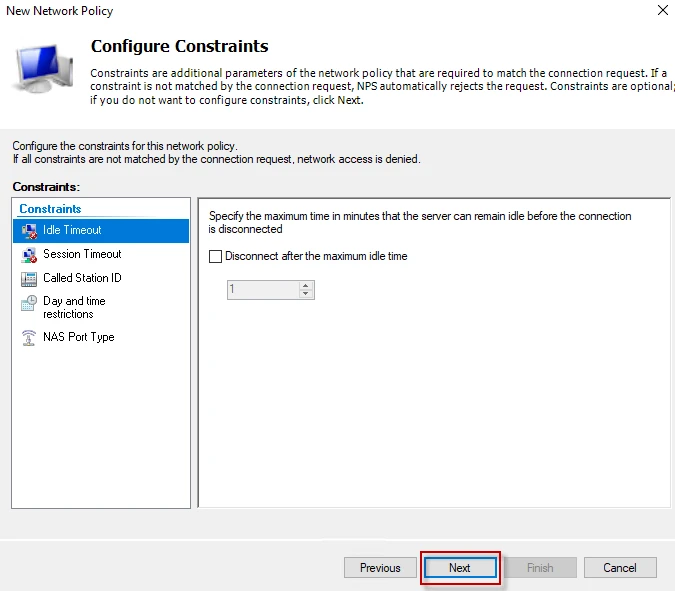
Step-7: In this window, you can pick days and times, allowing access only on these days and these times. For example, you can let your users to connect to your network resources only at the weekend. For simplicity, I will not set any constrains. Click on “Next” to proceed.
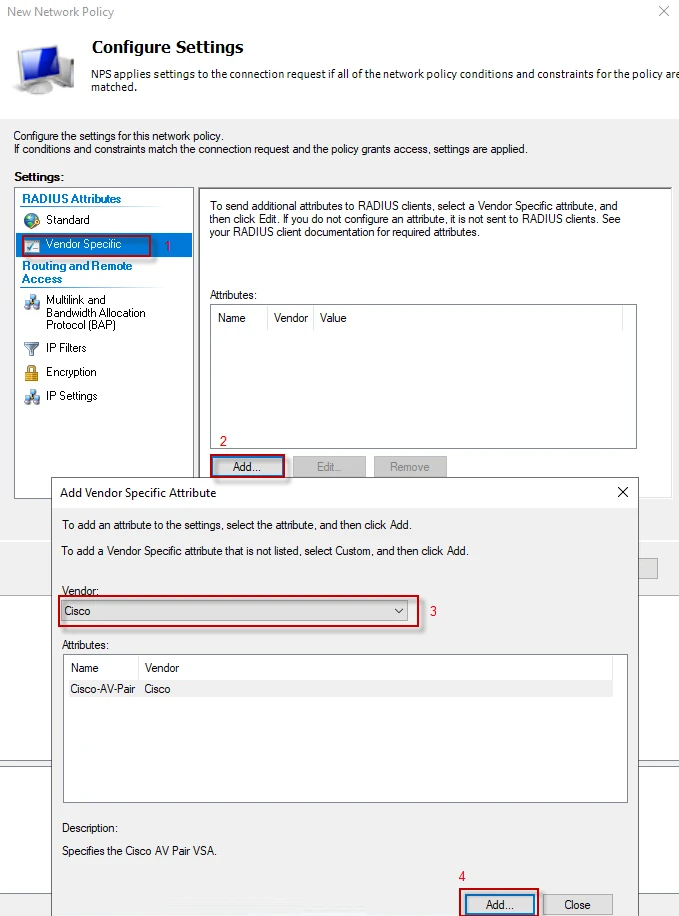
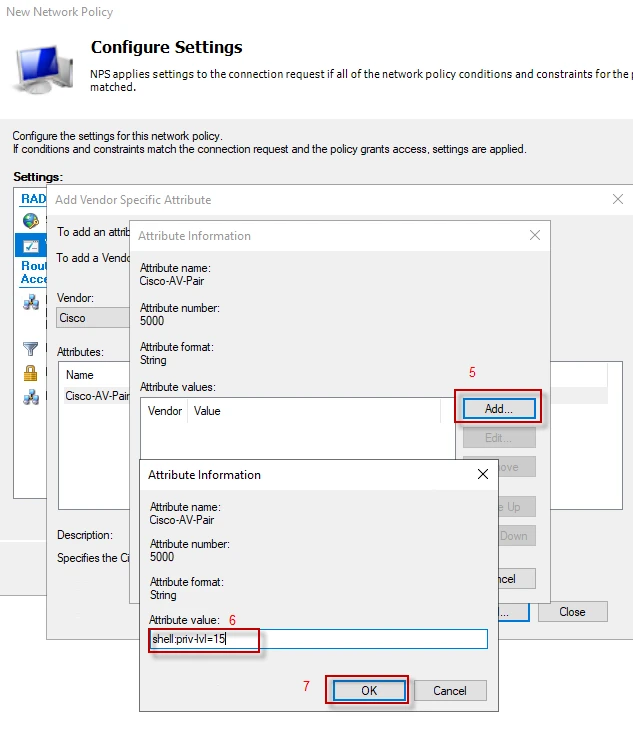
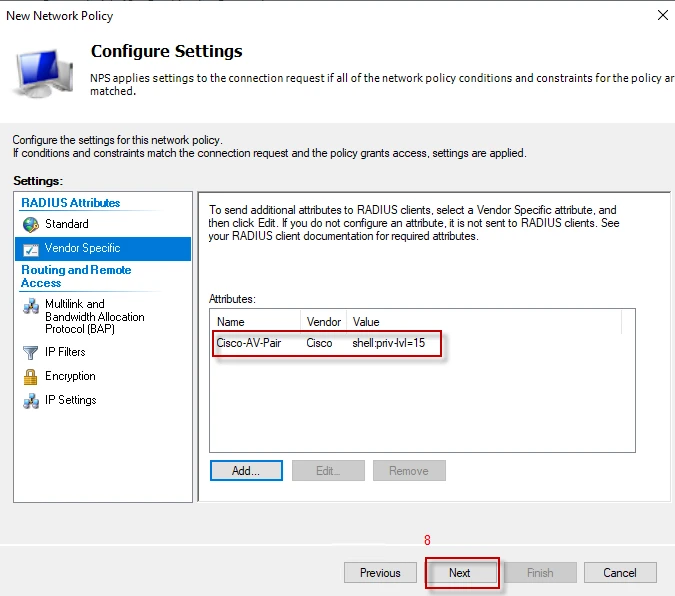
Step-8: We will set authorization attributes from this window. At the left pane, under “RADIUS Attributes” click “Standard”. You will see a couple of standard RADIUS attributes in the list. We do not need them which come default. Remove them from the list. At the left pane, under “RADIUS Attributes” click “Vendor Specific”, and then “Add”. Select Cisco from “Vendor” list and click “Add” to set the authorization information (shell:priv-lvl=15 attribute). Do not worry, if you use a vendor other than Cisco. You can add a “custom” vendor from the list.
Follow the steps below to send Cisco “Privilege Level” through an attribute.

Configuration on NPS server has finished.
Step-9: Click on “Finish” to complete the policy.
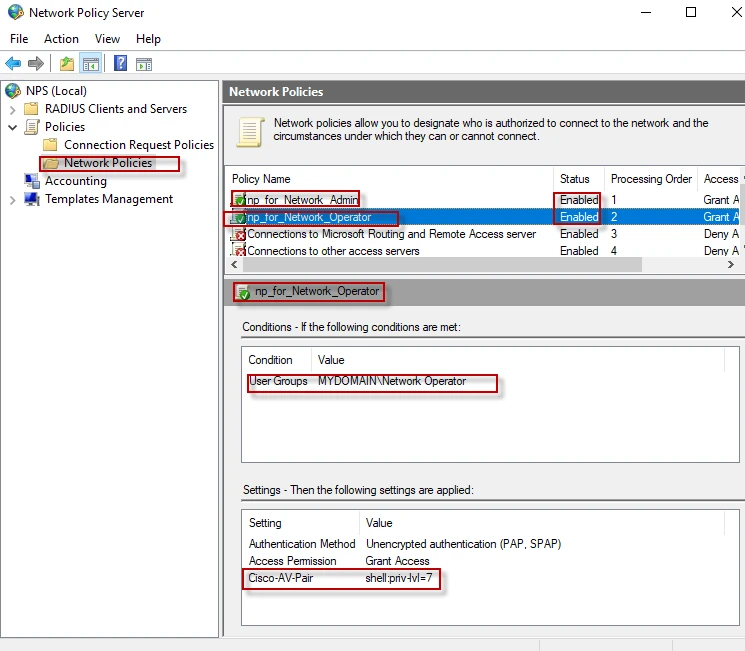
Step-10: Follow the same steps and create a new network policy for “Network Operator” group. The only difference is that you should authorize that group with lower privileges like “shell:priv-lvl=7”. I noticed that I had named my network policy “np_for_cisco_routers”. I will change it to “np_for_Network_Admin” for relevant naming. Following shows the final policies.
Testing authentication, authorization and accounting
I will login to the router with jane credentials while capturing packets with Wireshark.
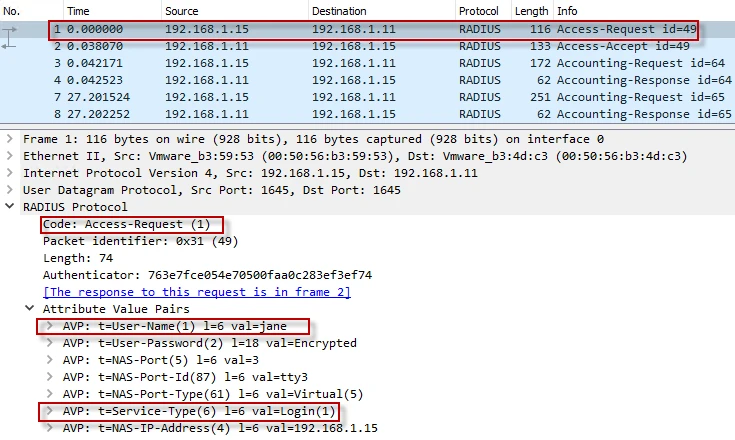
Step-1: The RADIUS client creates an “Access-Request” packet with number of attributes, asking the server to authenticate jane.
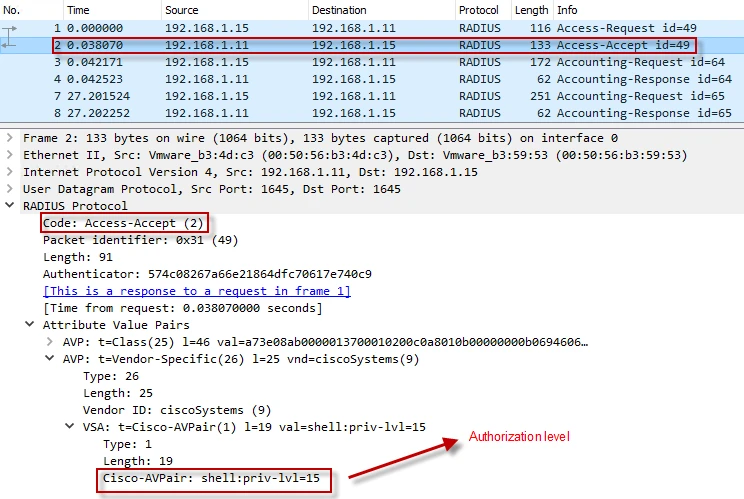
Step-2: The RADIUS server authenticates and authorizes jane with “priv-lvl=15” by “Access-Accept” packet.
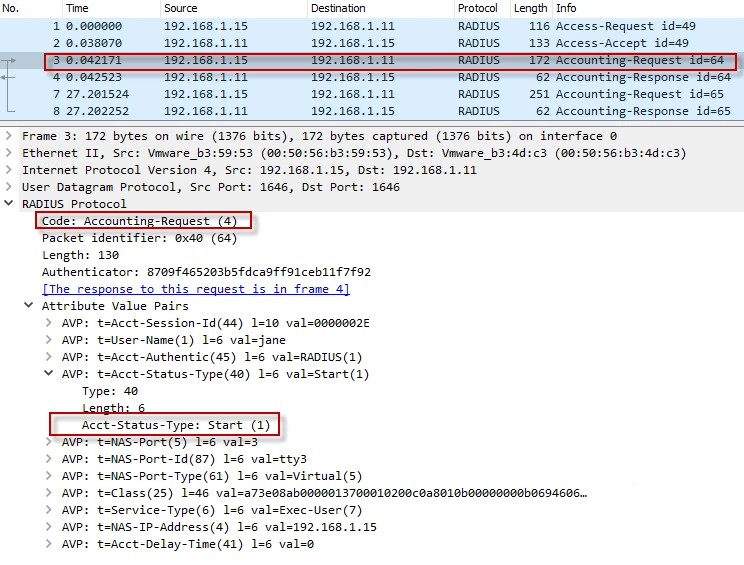
Step-3: The RADIUS client informs the server that the client started to use the service with “Accounting-Request” packet.
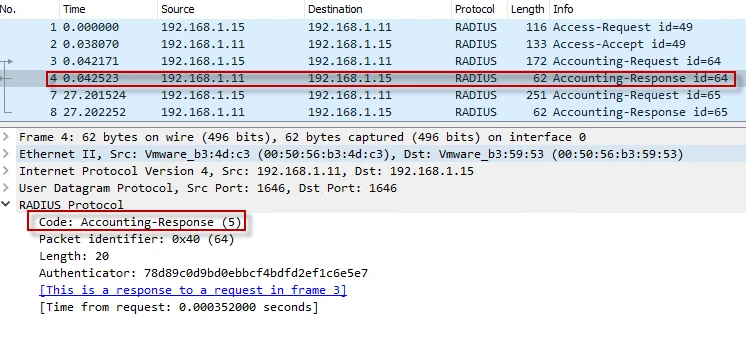
Step-4: The RADIUS server acknowledges the client with “Accounting Response” packet.
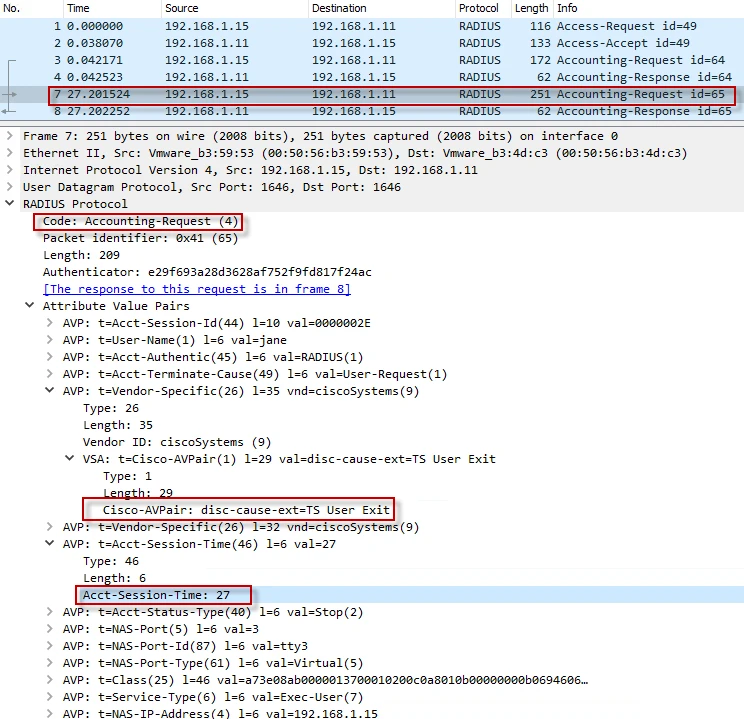
Step-5: The RADIUS client informs the server that the client disconnected and remained connected for 27 seconds with “Accounting-Request” packet.
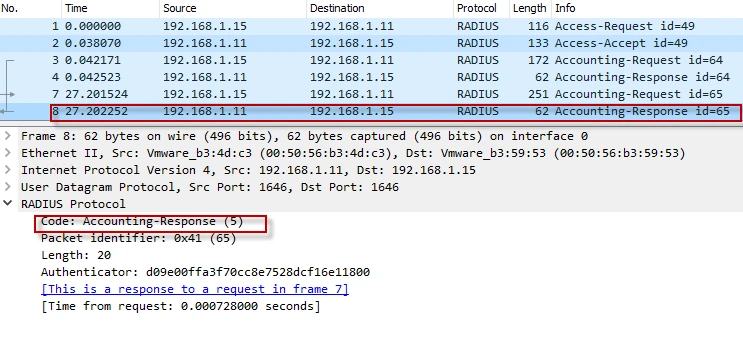
Step-6: The RADIUS server acknowledges the client with “Accounting Response” packet.
Login to the NAS (router) to check the authorization level
I will login to the router with “jane” and “john” who are member of different groups.
Step-1: Make an SSH connection to the NAS with jane’s credential and run “show privilege”. My output is below.
login as: jane
Keyboard-interactive authentication prompts from server:
| Password:
End of keyboard-interactive prompts from server
RB_GW# show privilege
Current privilege level is 15
RB_GW#
Step-2: Make an SSH connection to the NAS with john’s credential and run “show privilege”. My output is below.
login as: john
Keyboard-interactive authentication prompts from server:
| Password:
End of keyboard-interactive prompts from server
RB_GW# show privilege
Current privilege level is 7
RB_GW#
Final thoughts
NPS is the Microsoft implementation of a Remote Authentication Dial-in User Service (RADIUS) server and proxy. It is very easy to configure it for authentication, authorization and accounting.