![How to safely migrate a Git repository [100% Working]](/migrate-a-git-repository/git_migrate_repo.jpg)
Getting started with git repository migration
You can easily migrate a git repositorybetween local directories or two remotes if you understand the appropriate steps. Here, we will migrate a git repository from GitHub to GitLab. We will set up GitLab from scratch and migrate the repository using these steps:
- Checkout the target branch and fetch all tags
- Remove the old repository’s remote
- Reset the upstream
- Push to a new destination
However, the process may not be that easy because each repository has its rules for pushing and pulling. For instance, GitLab does not permit interaction with the repository before setting up an SSH key.
Additionally, you need to configure your details on the terminal so that the new repository identifies with the author. Better yet, it would help to understand the nitty-gritty of migrating a git repository. Let us get started.
Preliminaries to migrate a git repository
First, you should understand how to set, list, add and remove a remote. Next, you should know how to access the second repository safely and test the files migration. Here is how to do everything from scratch.
Working with git upstream
A git upstream is a link between the local repository and its remote. For instance, git needs to pull or push changes from your terminal to GitHub. Technically, an upstream is the repo’s URL.
It is easier to manage an alias of the URL than the lengthy HTTPS or SSH link. Since git has a reserved word, remote, referring to the link, you can customize the link as short as you wish. For example, you can use a four-letter command during git push.
git push origin main
where origin is the name of the remote, while main is the branch you
are sending the files to. You can view the name using the remote
keyword and -v option.
git remote -v
OR
peek into the .git subdirectory.
ls .git/logs/refs/remotes
Although most servers conventionally use origin or upstream, you can
change the name to any word.
git remote add <name> <URL>
Before resetting the remote, you need to delete it using the remove keyword.
git remote rm <name>
OR
git remote remove <name>
Configure git details
Configuring git details is one of the key steps to undergo since committing and pushing changes requires the author’s username and email.
Sometimes GitHub denies your login if the configured details differ from the registered information. Although GitLab mostly needs only SSH key match, you may reconfigure the details to match git and GitLab information.
You can check the configured details as follows:
git config --global user.name

git config --global user.email

git config --global -e

If you are OK with the existing details, move to the next step: repository building. Otherwise, change the details as follows.
git config --global user.name <username>

git config --global user.email <email address>
Build the repository
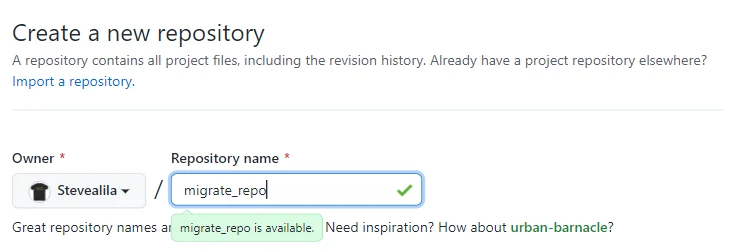
Sign in to GitHub. Otherwise, create an account and configure SSH or Personal Access Token before you build or migrate a repository from GitHub to GitLab.
I am creating a repository on GitHub, migrate_repo.
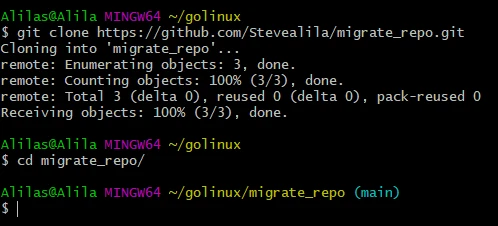
Copy the repository URL and clone it. Navigate into the repository and build five commits as follows.
cd migrate_repo
Commit two:
touch file

git add file

git commit -m "Second commit"
Commit three:
echo "modify the file" >> file

git add .

git commit -m "Third commit"
Commit four:
mkdir folder1

cd folder1

touch f1 f2

cd ..

git add *

git commit -m "Fourth commit"
Commit five:
git switch -C second_branch

touch file2

git add file2

git commit -m "Fifth commit"

git checkout main

git merge second_branch
Let us check history before pushing the changes to GitHub.
git log

git push
We have five commits.
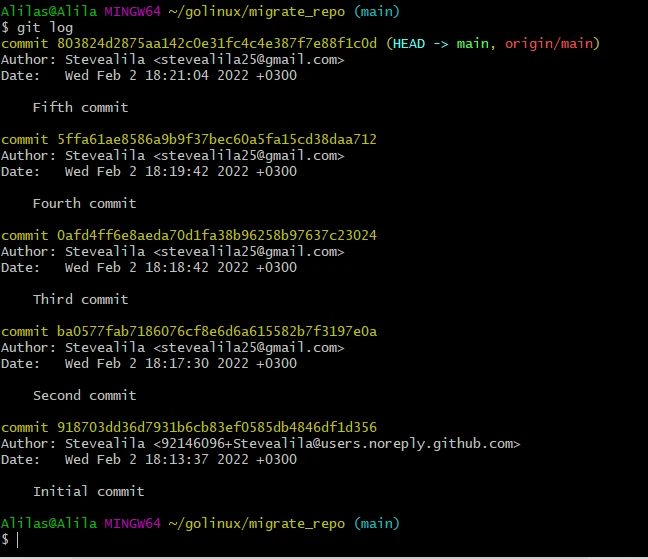
The remote now has a folder and three files. And the latest commit is Fifth commit. Assume we want to migrate the same git repository from this account (GitHub) to the destination account (GitLab). Let us set GitLab before we migrate a git repository.
Set up the destination account
Sign up
Move to GitLab’s website and create an account by clicking on the user icon. Below the login form, you see Don’t have an account yet? Register now. Click on the Register now link. Enter your details, then confirm you are not a robot.
Then click on the Register button. Wait for the confirmation email from GitLab informing you of account creation progress or success. Alternatively, you can sign up with Google or GitHub.
Generate SSH key pairs
After creating the account, log in and generate SSH key pairs. Let us
generate the securest and easiest to manage key type: EdDSA. Do that
by running the command this command, replacing the message part.
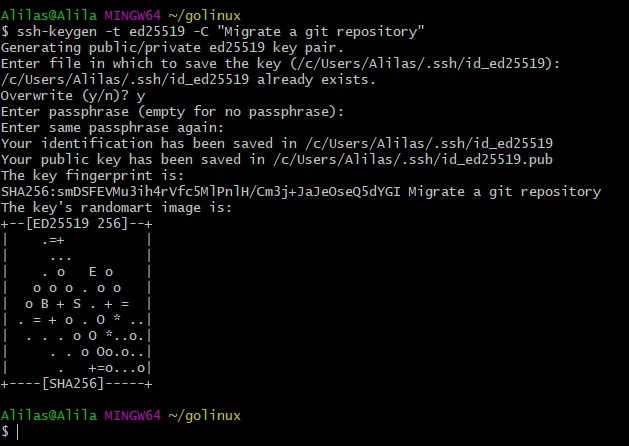
ssh-keygen -t ed25519 -C "<message>"

ssh-keygen -t ed25519 -C "Migrate a git repository"
ssh-keygen is the command to generate SSH key pairs (public and
private). -t represents the key type, whereas the -C option is for
comment.
cat and copy the public portion of the key.

Sign in to your GitLab account. Click on Preferences on the dropdown of your profile photo.
On the left menu, you see SSH keys. Click on it. Paste the key you just copied into the textarea labelled key. Set the expiry date, and click on Add SSH keys.

Now we can migrate a git repository from GitHub to GitLab as follows.
Migrate git repository from GitHub to GitLab (Step-by-Step)
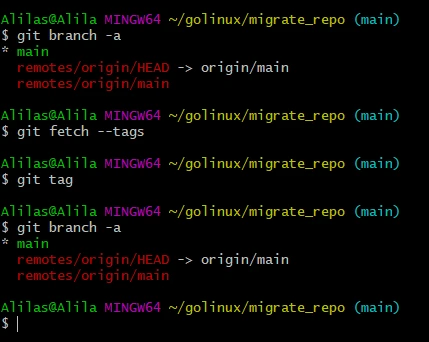
Step~1: Checkout the target branch and fetch all tags
We will skip the repo cloning step since we have cloned the old repository on the local machine. So, our next step will be checking out the branch whose content we want to migrate then fetching all tags.
git branch -a

git checkout main

git fetch --tags
Step~2: Remove the old repository’s remote
Let us check and remove the remote.
git remote -v

git remote rm origin

git remote -v
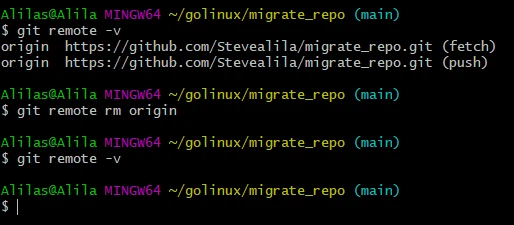
The upstream no longer exists. Let us reset it.
Step~3: Reset the upstream
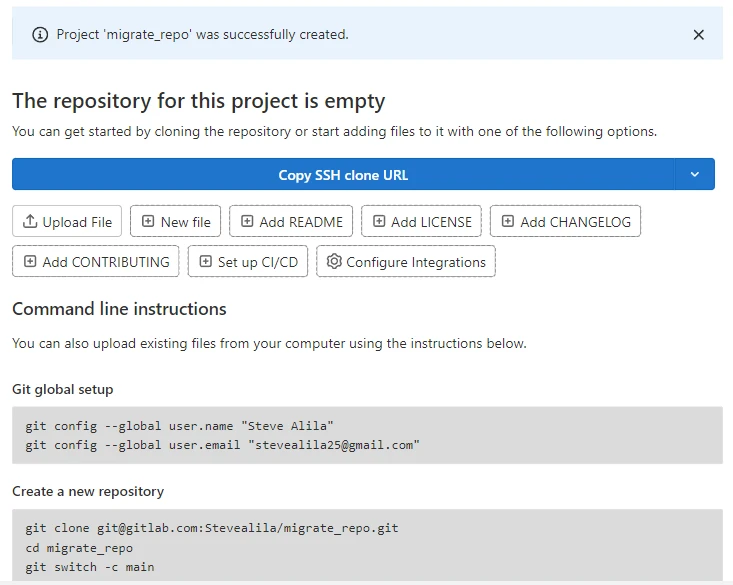
Head over to GitLab and create an empty repository with the exact name as the old repository’s. Click on Create blank project, add the repository name and click on Create project.
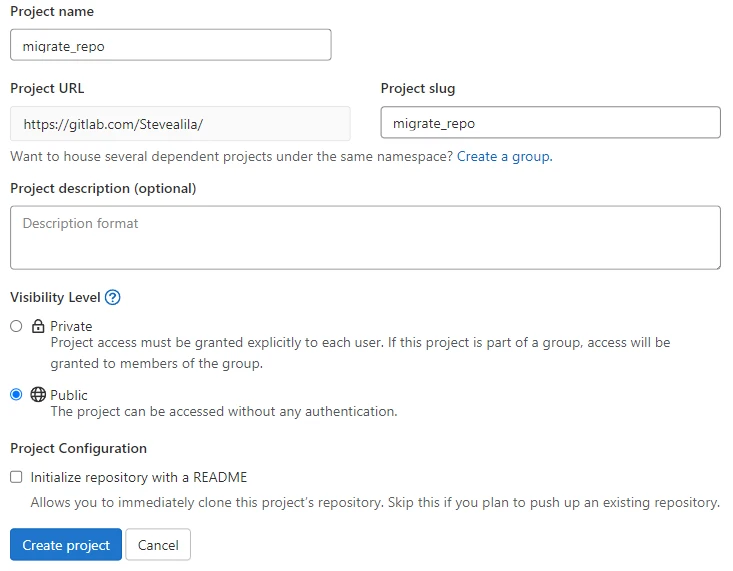
Copy SSH clone URL and return to the terminal.
Add the remote by replacing my GitLab URL with yours.
git remote add origin git@gitlab.com:Stevealila/migrate_repo.git
Step~4: Push to the new destination
Let us push the branches and tags as follows.
git push origin --all

git push --tags
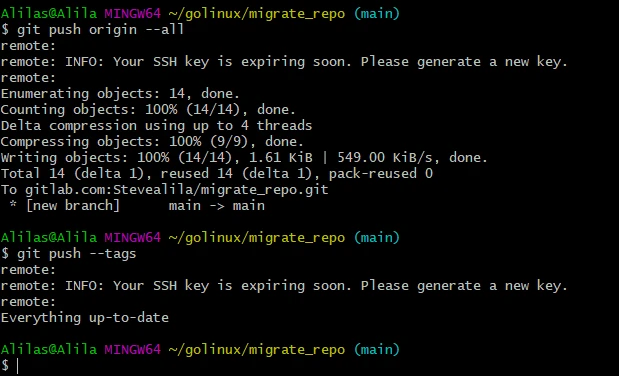
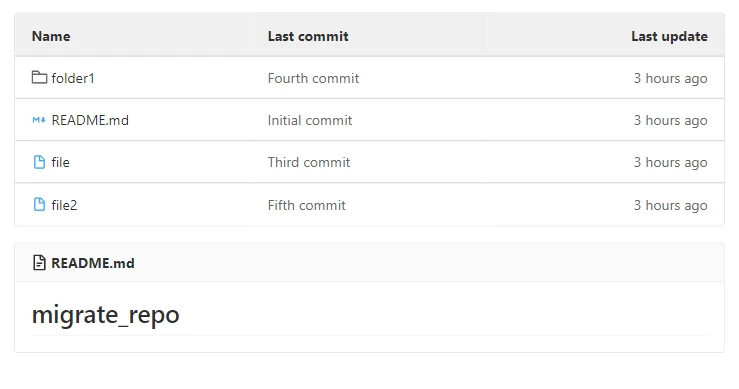
Let us confirm the migrate a git repository success on GitLab. Our files have successfully migrated, and the two remote repositories have similar content.
Conclusion
It is easy to migrate a git repository if you can set the upstream, configure git details and manage tags and branches. As shown in this tutorial, understanding the above information makes it simple to migrate files and folders.