![Getting started with Laravel Kafka [In-Depth Tutorial]](/laravel-kafka-tutorial/laravel-kafka.jpg)
In today’s fast-paced and data-driven world, real-time data processing and event-driven architectures are becoming increasingly important.
Laravel, one of the most popular PHP frameworks, seamlessly integrates with Apache Kafka through the powerful Laravel Kafka package. This integration empowers you to build scalable, fault-tolerant, and real-time applications easily.
This blog post explores everything you need to know to get started with this powerful combination. We walk you through the installation and setup process. We then demonstrate how to produce messages to Kafka topics and showcase how to consume messages for efficient processing.
Read on to learn more.
Installing and Setting up Laravel Kafka
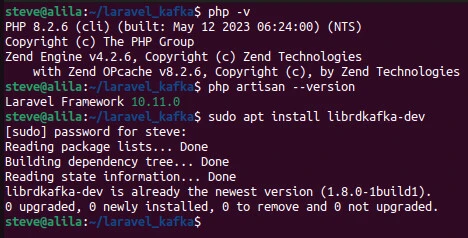
Get the Requirements
Laravel Kafka requires PHP version 8.0+, Laravel version 8+, and
rdkafka PHP extension, which provides a production-ready, Kafka client
for PHP. You can
install the
PHP extension on a Debian-based distribution using the following
command.
sudo apt install librdkafka-dev
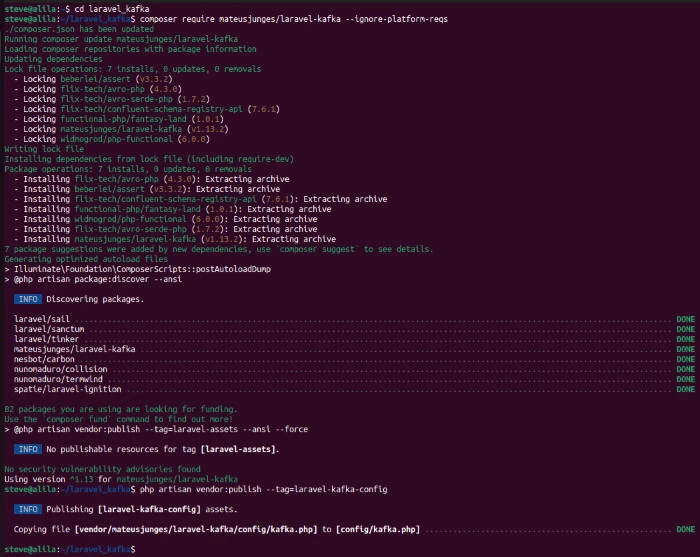
Install Laravel Kafka
Run the following command to install Laravel Kafka:
composer require mateusjunges/laravel-kafka
Add the --ignore-platform-reqs option to the command if you get an
error similar to Package mateusjunges/laravel-kafka has requirements
incompatible with your PHP version, PHP extensions and Composer version
after installing the requirements.
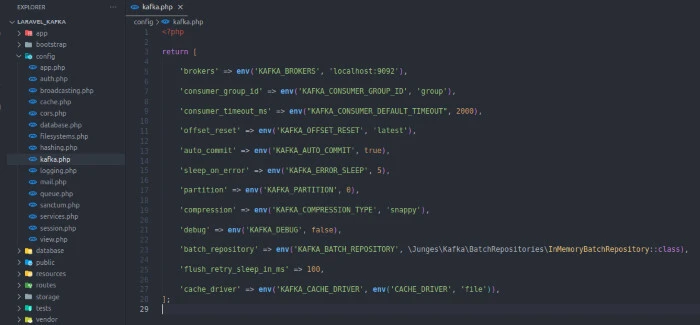
Set up Laravel Kafka
Publish the config files.
php artisan vendor:publish --tag=laravel-kafka-config
Your config/kafka.php file should appear like this:
<?php

return [
    /*
     | Your kafka brokers url.
     */
    'brokers' => env('KAFKA_BROKERS', 'localhost:9092'),

    /*
     | Kafka consumers belonging to the same consumer group share a group id.
     | The consumers in a group then divides the topic partitions as fairly amongst themselves as possible by
     | establishing that each partition is only consumed by a single consumer from the group.
     | This config defines the consumer group id you want to use for your project.
     */
    'consumer_group_id' => env('KAFKA_CONSUMER_GROUP_ID', 'group'),

    'consumer_timeout_ms' => env("KAFKA_CONSUMER_DEFAULT_TIMEOUT", 2000),

    /*
     | After the consumer receives its assignment from the coordinator,
     | it must determine the initial position for each assigned partition.
     | When the group is first created, before any messages have been consumed, the position is set according to a configurable
     | offset reset policy (auto.offset.reset). Typically, consumption starts either at the earliest offset or the latest offset.
     | You can choose between "latest", "earliest" or "none".
     */
    'offset_reset' => env('KAFKA_OFFSET_RESET', 'latest'),

    /*
     | If you set enable.auto.commit (which is the default), then the consumer will automatically commit offsets periodically at the
     | interval set by auto.commit.interval.ms.
     */
    'auto_commit' => env('KAFKA_AUTO_COMMIT', true),

    'sleep_on_error' => env('KAFKA_ERROR_SLEEP', 5),

    'partition' => env('KAFKA_PARTITION', 0),

    /*
     | Kafka supports 4 compression codecs: none , gzip , lz4 and snappy
     */
    'compression' => env('KAFKA_COMPRESSION_TYPE', 'snappy'),

    /*
     | Choose if debug is enabled or not.
     */
    'debug' => env('KAFKA_DEBUG', false),

    /*
     | Repository for batching messages together
     | Implement BatchRepositoryInterface to save batches in different storage
     */
    'batch_repository' => env('KAFKA_BATCH_REPOSITORY', \Junges\Kafka\BatchRepositories\InMemoryBatchRepository::class),

    /*
     | The sleep time in milliseconds that will be used when retrying flush
     */
    'flush_retry_sleep_in_ms' => 100,

    /*
     | The cache driver that will be used
     */
    'cache_driver' => env('KAFKA_CACHE_DRIVER', env('CACHE_DRIVER', 'file')),
];
Producing Messages with Laravel Kafka
You can publish messages to Kafka using the publishOn method, which
returns a ProducerBuilder instance.
use Junges\Kafka\Facades\Kafka;
Kafka::publishOn('topic')
The ProducerBuilder instance contains methods to configure the Kafka
producer. Some of the methods are withConfigOption,
withConfigOptions, withDebugEnabled, and withDebugDisabled.
use Junges\Kafka\Facades\Kafka;

$producer = Kafka::publishOn('topic')
    ->withConfigOption('property-name', 'property-value')
    ->withConfigOptions([
        'property-name' => 'property-value'
    ])
    ->withDebugEnabled() // To enable debug mode
    ->withDebugDisabled() // To disable debug mode
    ->withDebugEnabled(false) // Also to disable debug mode
The withConfigOption method sets a \RdKafka\Conf::class option. The
withConfigOption sets a config per call, whereas the
withConfigOptions takes an array of options of name - value format.
The withHeaders method lets you configure message headers.
use Junges\Kafka\Facades\Kafka;

$producer = Kafka::publishOn('topic')
    ->withHeaders([
        'header-key' => 'header-value'
    ])
You can configure message body with withMessage or withBodyKey. The
withMessage accepts Message class as an argument and sets the entire
message with it.
use Junges\Kafka\Facades\Kafka;
use Junges\Kafka\Message\Message;

$new_message = new Message(
    headers: ['header-key' => 'header-value'],
    body: ['key' => 'value'],
    key: 'kafka key here'
)

$producer = Kafka::publishOn('topic')->withMessage($new_message);
On the other hand, withBodyKey sets only a message key.
use Junges\Kafka\Facades\Kafka;
$producer = Kafka::publishOn('topic')->withBodyKey('key', 'value');
You can use the key with the withKafkaKey method.
use Junges\Kafka\Facades\Kafka;
$producer = Kafka::publishOn('topic')->withKafkaKey('key');
Lastly, you can send the message to Kafka using the send method.
$producer->send();
Consuming Messages with Laravel Kafka
Your application can read messages from a Kafka topic by creating a consumer object, subscribing to the topic and receiving messages.
The Kafka class’ createConsumer method creates a consumer and
returns ConsumerBuilder class, which you can use to configure the
consumer.
use Junges\Kafka\Facades\Kafka;
$consumer = Kafka::createConsumer();
You can specify the topics, consumer group id, and the broker.
use Junges\Kafka\Facades\Kafka;
$consumer = Kafka::createConsumer(['topic_1', 'topic_2'], 'group_id', 'broker');
Some of the methods of the ConsumerBuilder class are subscribe,
withConsumerGroupId, withHandler, build, and consume. The
subscribe lets you subscribe to a topic or array of topics.
use Junges\Kafka\Facades\Kafka;
$consumer = Kafka::createConsumer()->subscribe('topic');
The withConsumerGroupId lets you attach a consumer to a group. The
consumers in a group share group id and divide the topic partitions
fairly amongst themselves with each consumer being attached to one
partition.
use Junges\Kafka\Facades\Kafka;
$consumer = Kafka::createConsumer()->withConsumerGroupId('consumer_group');
The withHandler method lets you specify a handler for your consumer.
$consumer->withHandler(function(\Junges\Kafka\Contracts\KafkaConsumerMessage $message) {
    // Handle your message
});
The KafkaConsumerMessage contract returns methods to get the message
properties. Here are some of the methods and what they return:
getKey(): Kafka Message Key.getTopicName(): Topic where the message was published.getPartition(): Kafka partition where the message was published.getHeaders(): Kafka message headers.getBody(): Message body.getOffset(): The offset where the message was published.
Lastly, you can build and consume the message with respective methods.
use Junges\Kafka\Facades\Kafka;
$consumer = Kafka::createConsumer()->build();
$consumer->consume();
Conclusion
Laravel Kafka provides seamless integration between the Laravel framework and Apache Kafka, enabling you to build scalable, fault-tolerant, and real-time applications.
This blog post covered installation, setup, production, and consumption of messages using Laravel Kafka. Now you should be able to set up Laravel Kafka, configure Kafka connections, and create producers and consumers.