![How to replace DOM Element JavaScript? [SOLVED]](/javascript-replace-dom-element/javascript-replace-dom-element.jpg)
Welcome to our comprehensive guide on “How to Replace DOM Elements in JavaScript”! In today’s fast-paced web development landscape, it’s vital to understand how to manipulate and interact with the Document Object Model (DOM) effectively. In this tutorial, we’ll explore the essential techniques for replacing DOM elements using JavaScript, ensuring that you have the skills necessary to build dynamic, interactive web applications. Get ready to dive into the world of DOM manipulation and unlock the full potential of your web projects!
Different methods to replace DOM Element with JavaScript
JavaScript is a client-side scripting language used to add interactivity to web pages. One of the main tasks in JavaScript is to manipulate the Document Object Model (DOM), which is a hierarchical tree structure of all the HTML elements on a web page.
One common DOM manipulation task is replacing elements in the DOM. In
this article, we will discuss two methods for replacing elements in the
DOM: the replaceChild() method and the replaceWith() method.
In this article, we will discuss how to replace elements in DOM using JavaScript built-in methods.
Method-1: Using the replaceChild() method to replace element
The replaceChild() method is used to replace a child node in a parent node. It takes two arguments: the new node to be added and the old node to be replaced.
Here is the syntax for the replaceChild() method to replace element in
DOM.
parentNode.replaceChild(newNode, oldNode);
Before we go into the example to illustrate how the replaceChild()
method works, we need to understand that we will need the
createElement() to create the new node or element we need to replace
the element in the DOM.
The syntax to create the element in JavaScript using the
createElement() can be seen below
document.createElement(element);
Now, we can replace elements using the replaceChild() and
createElement() method. To illustrate the process to replace an
element or node, we will create a simple HTML page and replace the
heading with a new heading text and add a class name to the new element
created.
<!DOCTYPE html>
<html lang="en">
    <head>
        <meta charset="UTF-8" />
        <meta http-equiv="X-UA-Compatible" content="IE=edge" />
        <meta name="viewport" content="width=device-width, initial-scale=1.0" />
        <title>DOM Selector</title>
    </head>
    <body>
        <h1 id="old">JavaScript replace element</h1>
        <div class="main">
            <p>We can make use of two methods replace elements;</p>
            <ul id="inside">
                <li>replaceChild()</li>
                <li>replaceWith()</li>
            </ul>
        </div>
    </body>
    <script src="script.js"></script>
</html>
The script.js file
let oldNode = document.getElementById("old");
let newNode = document.createElement("h1");

newNode.className = "new-heading";
newNode.innerHTML = "DOM Manipulation and Element Replacement";
let parentNode = oldNode.parentNode;

parentNode.replaceChild(newNode, oldNode);
Output
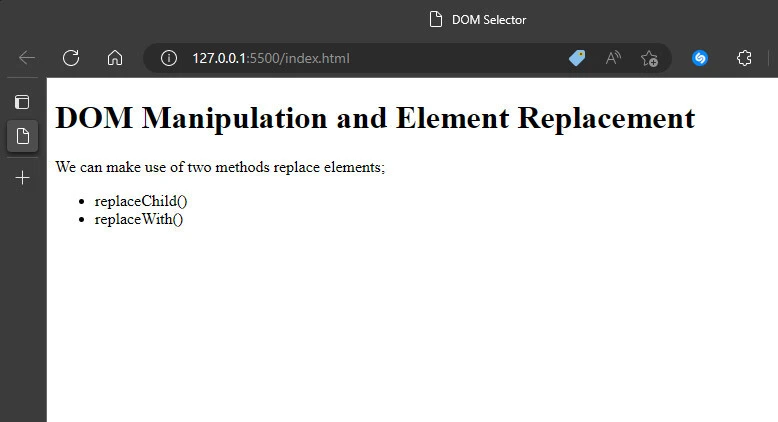
In the code, we obtain the element we want to replace with the
getElementById() method and create the element we want to add with the
createElement() method. Afterwards, we assign a new class using the
className property and add new content to the newly created element
newNode. Then, we reference the new element/node to the old node and
apply the replaceChild() method to replace the old node/element.
Method-2: Using the replaceWith() method to replace element
The replaceWith() method is a more modern and concise way to replace
an element in the DOM. It is available in modern browsers and can be
used as an alternative to replaceChild(). The method works pretty much
like the replaceChild() method. It replaces the
element in the
children list of its parent with a set of Node or string objects.
Here is the syntax to use the replaceWith() method
oldNode.replaceWith(newNode);
Similarly, we need to use the createElement() method to create the
element we are going to add to replace the old element. Then, we use the
replaceWith() method to replace the element. To illustrate this, we
will replace the second list item - replaceWith() - within the HTML page
in the previous section with a new text -
Wow - replaceWith() is amazing.
Our script.js file would go thus;
let oldNode = document.querySelectorAll("li")[1];
let newNode = document.createElement("li");

newNode.className = "new-list";
newNode.innerHTML = "Wow - replaceWith() is amazing";

oldNode.replaceWith(newNode);
Output
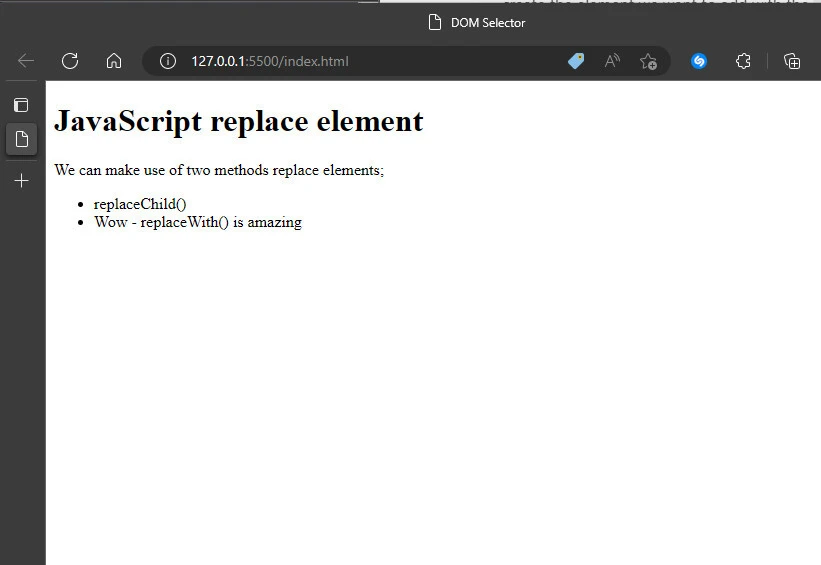
In the code, we use a different
DOM selector
method -
querySelectorAll -
to obtain all the li element, and since we know the order of the li
element with the text we want to replace, we can select it with the
bracket notation. Then, we apply a class name and innerHTML property and
use the replaceWith() method.
Summary
In this article, we discussed two methods for replacing elements in the
DOM: the replaceChild() method and the replaceWith() method. Both
methods allow you to replace an element in the DOM, but the
replaceWith() method is more modern and concise.
When replacing elements in the DOM, it’s important to
understand the
difference between the two methods and choose the one that best fits
your needs. Whether you’re using the replaceChild() method or the
replaceWith() method, being able to replace elements in the DOM is a
powerful tool for adding interactivity to web pages and improving user
experience.
References
Node.replaceChild() - Web APIs |
MDN (mozilla.org)
Element.replaceWith() - Web APIs
| MDN (mozilla.org)
Document.createElement() - Web
APIs | MDN (mozilla.org)