![Getting started with NodeJS [Beginners Tutorial]](/getting-started-with-nodejs-tutorial/nodejs_tutorial.jpg)
Getting started with NodeJS the right way empowers you to exploit the potential of NodeJS. This tutorial walks you through NodeJS overview, mainly focusing on imparting the mindset needed to fully and creatively apply NodeJS.
It would be be best to understand the JavaScript programming language, especially ES6 concepts like (promise-based or) asynchronous programming before following this tutorial. Next, install the latest version of Node.js and a code editor like Visual Studio Code.
We may interchange the terms like Node, Node.js, or NodeJS to mean the same thing.
Let’s do this!
Getting started with NodeJS by understanding its origin
Node.js is a runtime environment for JavaScript. That means Node.js is a program enabling you to execute JavaScript code. The runtime environment was built by embedding a C++ program into Google’s V8 engine.
Before Node.js creation, JavaScript ran entirely in the browser through the browser API.
The browser API communicates with the JavaScript engines like Spider Monkey (Mozilla) and V8 (Google Chrome). The engine then completes subsequent communications with the operating system till the process is complete and finally returns the output to the browser for display.
With the introduction of Node.js came the ability to run JavaScript code outside the browser. Here is how Node.js runs your JavaScript code.
Getting started with NodeJS processes
The browser gives you asynchronous API, preventing you from blocking the single JavaScript thread. The entire API is wrapped in the window object and is accessible through child objects like the document.
Similarly, the (node) wrapper is bundled with functionalities to interact with the operating system.
Node attempts to mirror the browser API. Several APIs like
setTimeout(), console.log(), and setInterval() work similarly in
both the browser’s window and Node’s global object.
However, this time around, your JavaScript code does not manipulate HTML
elements directly using the document object with its methods like
querySelector() or getElementById().
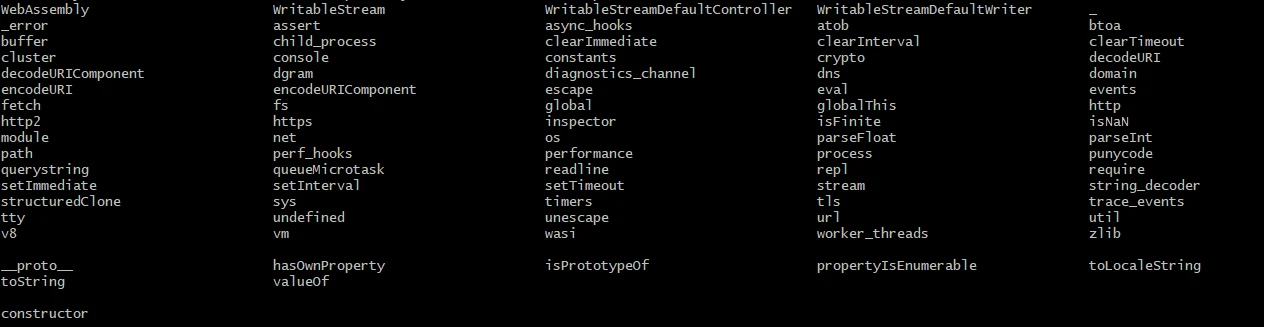
You can see the libraries by entering the REPL and double-tapping the tab key.
node

The libraries starting with capital letters are modern JavaScript
objects, while those starting with small letters are built-in Node.js
libraries. Exit the REPL by typing process.exit()
process.exit()
You can also use Node as a CLI tool. Check all you can do in Node as a
command-line tool by typing node followed by the -h flag.
node -h
For example, you can execute commands and print the result using the
-p flag. For instance, you could view the current date by running the
following command.
node -p "new Date()"
What happens when you run a Node command?
Running a node command initializes an operating system process. Node.js
continues to interact with the operating system process through its
built-in process object. The process object thus becomes the
interface between your node environment and the operating system
environment.
The interface reads and writes into the operating system at the low level. At a high level, you write Node.js programs, which are sent to the process object. You can also change the behavior of Node by setting the environment variables.
Running scripts
You need a code editor to write commands. For example, I am using Visual Studio Code in this tutorial. Most code editors come with a terminal for viewing the program output.
Next, create a file ending in the .js extension and open it with the
installed code editor.
Unlike the REPL, where you write commands and see the output instantly,
writing a Node script requires bundling the input in the process object.
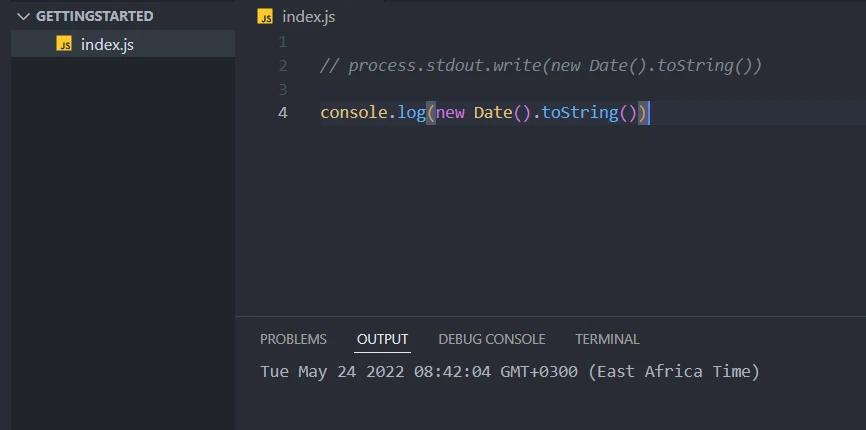
For example, we can see the output of the date object by wrapping the
command in the process.stdout.write()
process.stdout.write(new Date().toString())
We convert the output to a string because the write() method expects a
string. Better yet, we can use the high-level console object with the
log() method to print the output.
console.log(new Date())
Getting started with NodeJS modules
Node.js wraps your code in an immediately invoked functional expression
(IIFE). The function accepts five arguments: exports, require,
module, `filename`, and `dirname`.
exports, an alias to module.exports, is a mutable object. Each file
has a unique module.exports object that wraps the file’s code,
enabling you to create an interface between two files: exporting and
importing files.
The file being exported and imported is called a module. There are
three main types of modules in Node.js: built-in, installed, and custom
modules.
Getting started with NodeJS built-in modules
Built-in modules come with
Node.js
upon installation. You can print the built-in modules by
double-tapping the tab key or console-logging the limited
_builtinLibs property of the repl module.
Some of the frequently used Node’s built-in modules are:
- fs: short for the file system and is used to read and write files.
- path: enables you to work with folders and file paths.
- events: controls the output if something happens. The concept of
events plays a massive role in Node traits like the non-blocking I/O.
and most modules’ operations like the
httpmodule. - http : creates a web server.
Getting started with NodeJS installed and custom modules
You can install modules through the Node Package Manager (npm) or its
alternatives like Yarn and Node Version Manager (nvm).
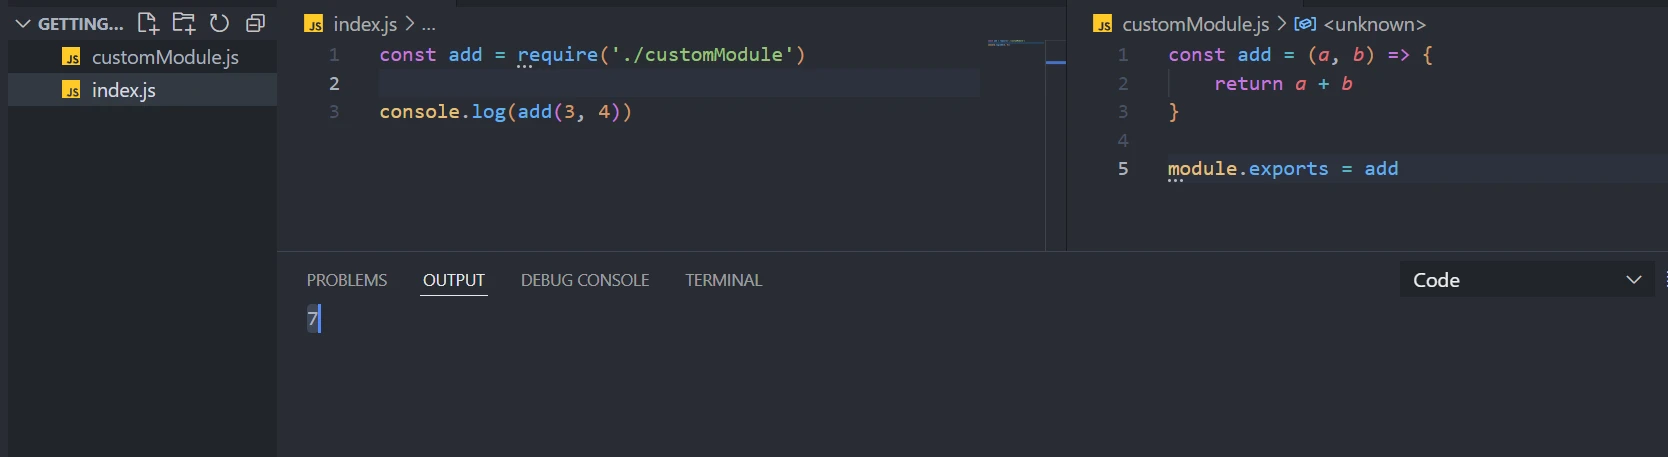
Lastly, you can create a custom module by writing a file and exporting the contents.
You import the module using Node’s native require() method.
A custom module requires you to specify the path, whereas you only need to specify the package name when importing built-in and installed modules.
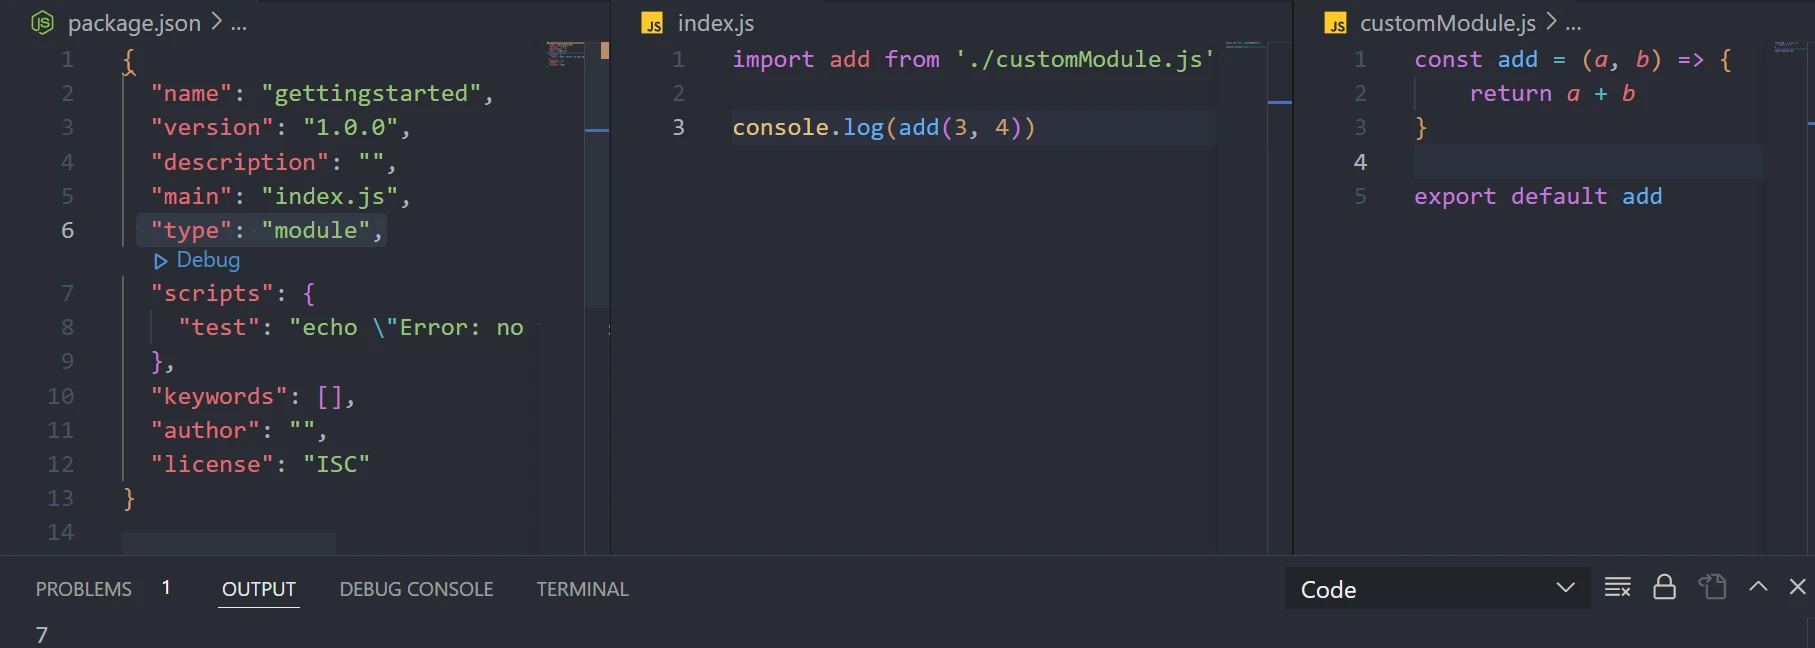
With the constantly changing Node versions, it is now possible to use
the ECMAScript’s import and export syntax in Nodejs.
You start by initializing your package as an NPM package.
npm init
# OR
npm init -y
Introduce the type key with the module value. This time around, you
should introduce the .js extension when importing files.
__dirname returns the full path to the current folder hosting your
(current) file. Use __filename instead to include the file name in the
output.
Getting started with NodeJS packages
On initializing the NPM, a package.json file is created. A package
describes the files you need for an installed module.
You can install or publish packages with NPM. Apart from managing the packages, NPX executes a package. The most immediate alternative to NPX and NPM is Yarn, whose uniqueness arises from its speed, consistency, and security.
The information in the package.json file determines the behavior of
your package. Although the must-have contents of the file are package
name and version, a standard package has scripts and
dependencies.
Scripts
Scripts control how to run commands. Some of the default scripts are
start, build, and test. You can run them without the run
command.
npm start
Otherwise, use the run command if you create a custom script.
npm run [script name]
Dependencies
Dependencies tell Node the (installed) packages used in your
application. The package primarily meant for local development is called
a dev dependency, and NPM references it under the devDependencies
portion of the package.json file.
NPM decides the type and location of a dependency according to how you
install the package. For example, the --save-dev flag, summarized as
-D, saves a package under devDependencies.
Using the --global flag, summarized as -g saves the package in your
system and is available for subsequent application(s) usage. Otherwise,
the package lands in dependencies section.
The packages are semantically versioned.
Whenever you import a module with a path, Node.js searches for the
module’s existence and configuration in the node_modules folder.
You can delete the node_modules folder and reinstate the module’s
configuration by running the NPM install command.
npm install
NPM goes to its repository or GitHub to fetch all the data needed for the target package to function.
Lastly, you can delete a package using the NPM uninstall command.
npm uninstall [package name]
What’s next?
After getting started with NodeJS, you should focus more on its core
modules like fs, path, events, and http.
Next, learn how to create a web server with frameworks like Express.js as you continue exploring Nodejs libraries shown in this tutorial.