![Connect VM to internet in Oracle VirtualBox [10 Steps]](/connect-internet-bridge-nat-vmware-virtualbox/internet.jpg)
There are various types of Network Mode available with Oracle VirtualBox. These two are the most used Virtualization Software by end users for performing R&D and testing.
Before we jump into out main topic on how to connect virtual machine to internet connection, you must have Oracle VirtualBox installed on your environment Server and also you must be familiar with the different types of Network Modes and which one would help us connect to internet using our Linux or Windows OS from the Virtual Machine.
I have written another article with detailed explanation of different network mode available with Oracle VirtualBox. So in this article I will be very brief and touching only those areas to cover our primary agenda to enable and connect virtual machine to internet connection.
Pre-requisite
To be able to connect your VM to internet, the easiest way is to configure your interface for DHCP instead of static IP. Although static IP also can be used if you are familiar with the networking concepts.
But here let me assume that you are new to the networking configurations in Linux and we will use DHCP.
Login to your Linux VM and use nmcli to list available interfaces
$ nmcli device status
DEVICE  TYPE      STATE      CONNECTION
enp0s3  ethernet  connected  Wired connection 1
lo      loopback  unmanaged  --
Check if DHCP is enabled on your interface:
$ nmcli con show "Wired connection 1" | grep ipv4.method
ipv4.method:                            auto
In my case the DHCP is already enabled but in your case you can enable DHCP if not enabled:
sudo nmcli con modify "Wired connection 1" ipv4.method auto
Next you need to refresh the network configuration so you can connect to your VM directly (if you are using SSH then your connection may break):
nmcli con down "Wired connection 1"
nmcli con up "Wired connection 1"
Verify that DHCP is Enabled and Working
nmcli con show "Wired connection 1" | grep ipv4.method
Steps to connect VM to Internet in Oracle VirtualBox
Network Address Translation (NAT) is one of the ways to connect a Virtual Machine (VM) to the internet in VirtualBox. NAT allows your VM to operate as if it’s a private device in a local network, but it can still access external networks, including the internet. Here’s how you can configure NAT for your VM:
Step 1: Open VirtualBox
Launch VirtualBox on your computer.
Step 2: Select Your VM
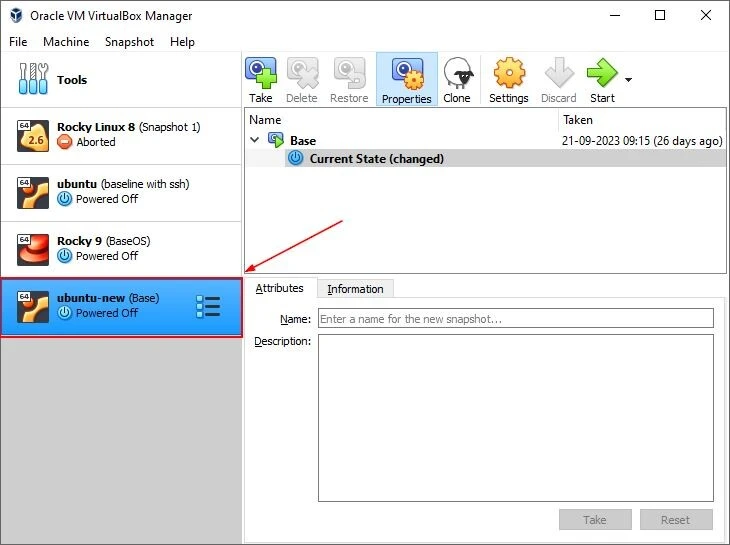
Choose the VM you want to configure for NAT from the list of available VMs on the left sidebar.
Step 3: Access Settings

With the VM selected, click on the “Settings” button, represented with a gear icon. It is located in the main toolbar.
Step 4: Navigate to Network Settings
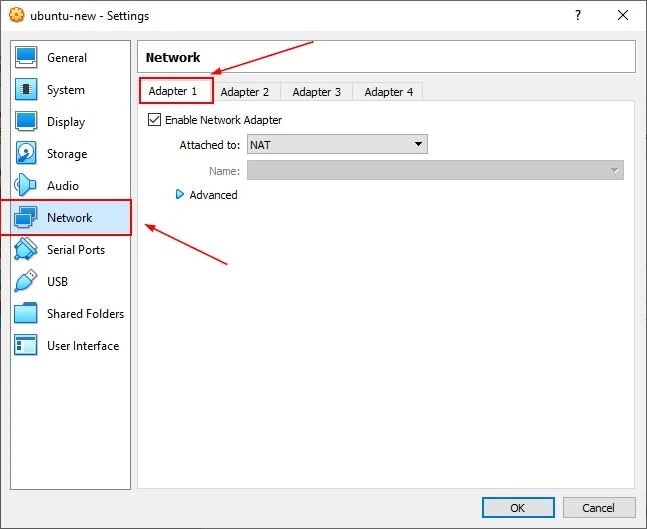
In the settings window, click on the “Network” tab.
Under the Network tab, you will see multiple adapters. Usually, “Adapter
1” is used to connect to the internet.
Make sure that the “Enable Network Adapter” checkbox is checked.
Step 5: Configure NAT
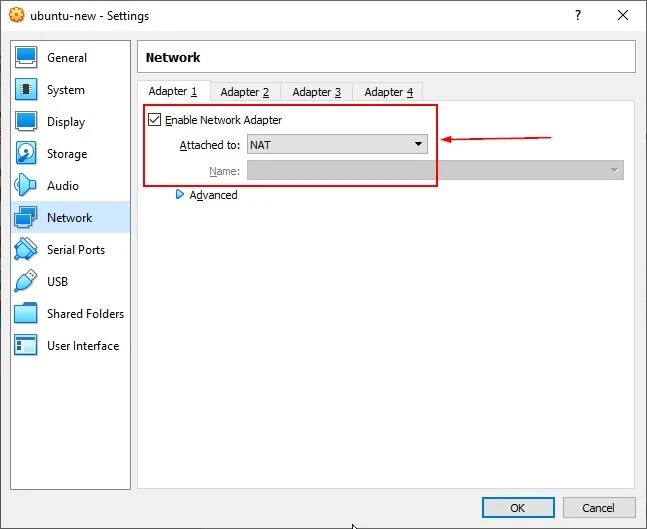
Next to “Attached to:”, open the dropdown menu.
Select “NAT” from the list of options.
Step 6: Advanced Settings (Optional)
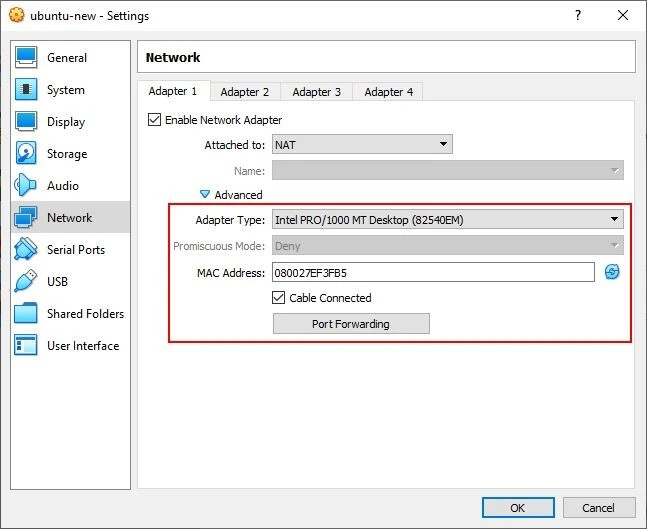
Click on the “Advanced” dropdown. Here, you can customize:
- Adapter Type
- Promiscuous Mode
- Cable Connected option
These settings can usually be left at their default values unless you have specific needs.
Step 7: Port Forwarding (Optional)
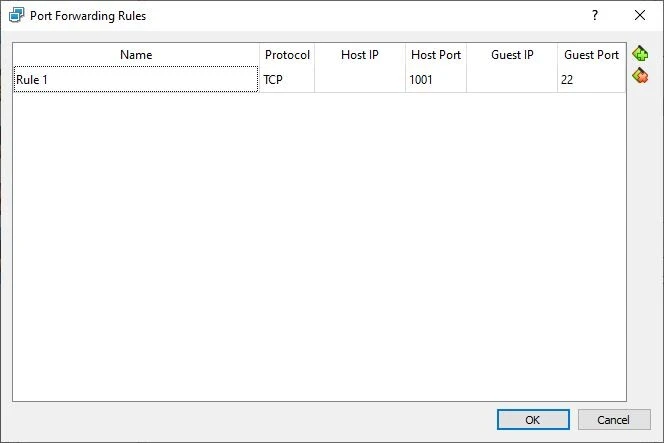
In the “Advanced” settings, you’ll also find the “Port Forwarding”
button.
This option allows you to set up rules to forward network ports from the
host to the guest VM.
I have configured this to forward all traffic on 1001 to port 22 which
allows me to SSH into the Linux container. You can choose to skip this.
Step 8: Save and Exit
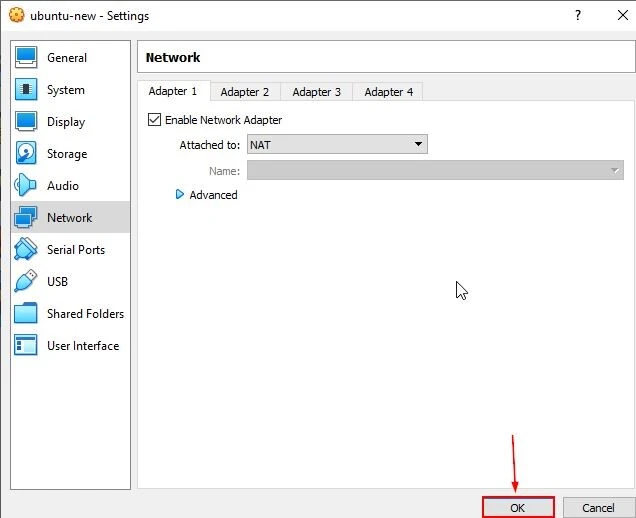
Click “OK” to close the settings window after making the necessary adjustments.
Step 9: Start Your VM
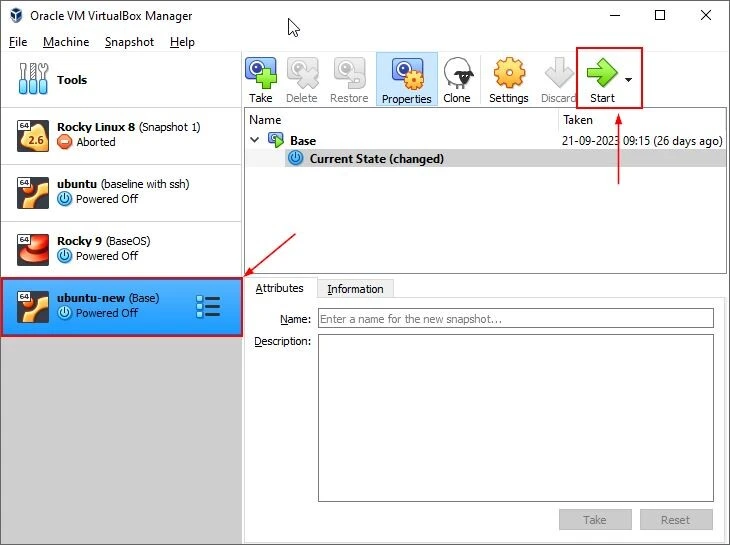
Back in the main VirtualBox window, start your VM by clicking the
“Start” button.
Once the VM boots up, you should be able to access the internet.
Step 10: Verification
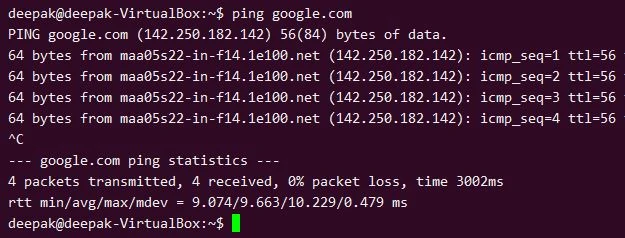
Verify the internet connection by opening a web browser in your VM and trying to access a website.
Summary
In this article, the focus has been solely placed on connecting a Virtual Machine (VM) to the internet in VirtualBox using the Network Address Translation (NAT) network mode. A meticulous step-by-step guide has been crafted to assist users in navigating through the process of configuring NAT, from the initiation steps of opening VirtualBox and selecting the preferred VM, to advanced configurations such as port forwarding.
NAT, acting as a private gateway for VMs, allows them to operate within a private internal network, where each VM accesses the external network (internet) by sharing the host’s IP address. This method ensures that VMs can connect to the internet securely and efficiently without requiring a unique IP address for each VM.
- Official VirtualBox Documentation
- VirtualBox User Manual
- Here, you can find detailed official documentation that covers various aspects of VirtualBox, including network configurations.
- VirtualBox Networking Modes Explanation
- VirtualBox Networking
- An in-depth explanation of various networking modes available in VirtualBox.
- NetworkManager Command Line Interface (nmcli)
- Nmcli Documentation
- Official documentation of
nmcli, a command-line client for NetworkManager.
- DHCP Lease Management
- DHCP Client Wiki
- A resource to understand DHCP lease renewal and other client operations.
