
After installing ansible now in this section we will setup our Ansible environment and configure our controller and managed nodes.
Create normal user
This is important as we will use this user to perform all ansible
related tasks. For the sake of this article I will create a user
“ansible”
[root@controller ~]# useradd ansible
Assign a password to this user
[root@controller ~]# passwd ansible
Repeat the same on managed nodes i.e. create the same user on all your managed hosts:
[root@server1 ~]# useradd ansible
[root@server1 ~]# passwd ansible

[root@server2 ~]# useradd ansible
[root@server2 ~]# passwd ansible
Configure password less authentication
We will set up password less authentication for our ansible user from controller to all the managed nodes. This is to ensure that the controller can connect to all the managed nodes without any password prompt.
Login as ansible user on the controller node and generate private public
key pair using
ssh-keygen.
We have pre-defined a blank password using -P “” in this example
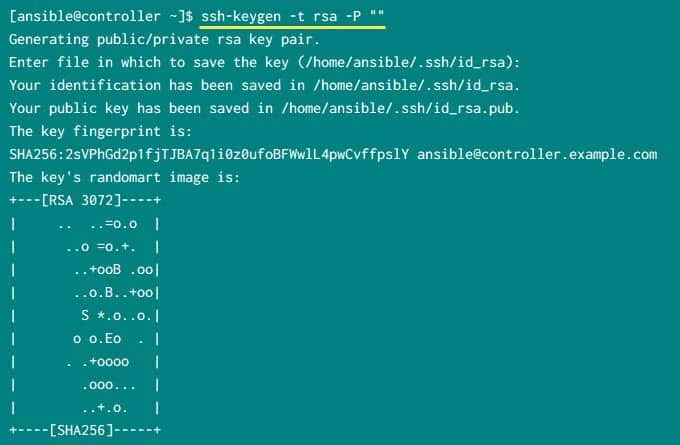
This step will create private and public key pair inside ~/.ssh
[ansible@controller ~]$ ls -al ~/.ssh/
total 20
drwx------ 2 ansible ansible 4096 Sep 19 13:17 .
drwx------ 4 ansible ansible 4096 Jan 29  2020 ..
-rw------- 1 ansible ansible  412 Jan 29  2020 authorized_keys
-rw------- 1 ansible ansible 2622 Sep 19 13:17 id_rsa
-rw-r--r-- 1 ansible ansible  584 Sep 19 13:17 id_rsa.pub
We will use ssh-copy-id to copy the keys to remote managed server and
add it to authorized_keys.
[ansible@controller ~]$ ssh-copy-id -i ~/.ssh/id_rsa.pub server1
[ansible@controller ~]$ ssh-copy-id -i ~/.ssh/id_rsa.pub server2
There was no need to use -i ~/.ssh/id_rsa.pub as there is a single
public key file so ssh-copy-id would have automatically picked it but
for the sake of simplicity I have added this argument.
Verify password less SSH authentication
The ssh-copy-id command will copy the public key we just created to
server1 and server2 and append the content of the key to ansible
user’s authorized_keys file under ~/.ssh
Once the public key is copied to managed nodes, you can try to do ssh as
ansible user and make sure you don’t get any password prompt
[ansible@controller ~]$ ssh server1
[ansible@controller ~]$ ssh server2
Configure privilege escalation using sudo
Since our ansible user would need privilege escalation we will create
a new rule for ansible user using a new file under /etc/sudoers.d
[root@controller ~]# cat /etc/sudoers.d/ansible
ansible ALL=(ALL) NOPASSWD: ALL
Add the same rule on all your managed hosts
[root@server1 ~]# echo "ansible ALL=(ALL) NOPASSWD: ALL" >> /etc/sudoers.d/ansible
[root@server2 ~]# echo "ansible ALL=(ALL) NOPASSWD: ALL" >> /etc/sudoers.d/ansible
Verify ansible connectivity
Next, we need to make sure that our controller is able to communicate
all the managed nodes. To achieve this, we would need an inventory file.
Since we have installed ansible using package manager, we will have our
default ansible configuration files under /etc/ansible.
[root@controller ~]# ls -l /etc/ansible/
total 28
-rw-r--r-- 1 root root 19985 Sep  4 04:01 ansible.cfg
-rw-r--r-- 1 root root  1016 Sep  4 04:01 hosts
drwxr-xr-x 2 root root  4096 Sep  4 04:01 roles
Here as root user add the hostname or IP address of your managed nodes
in /etc/ansible/hosts file.
[root@controller ~]# head -n 2 /etc/ansible/hosts
server1
server2
Next try to ping your managed nodes using the controller node as
ansible user with ansible all -m ping command:
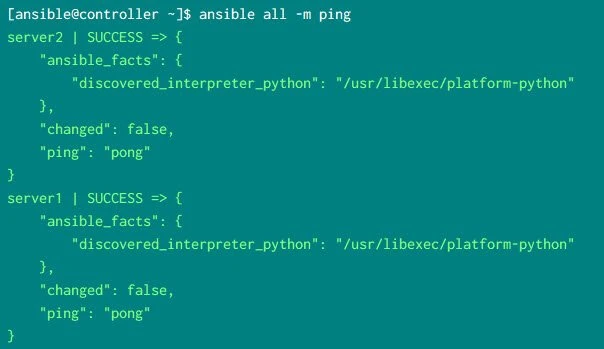
Look out for “ping”: “pong” which means that our controller node was
able to communicate with the managed nodes using
“/usr/libexec/platform-python” as the interpreter.
What’s Next
Now we are all done with the
Ansible
Installation and Configuration in our
Ansible Tutorial,
next we will learn more about
ansible configuration
file i.e. ansible.cfg
